

Resident Evil Requiem walkthrough, part 3
Care Center West Wing


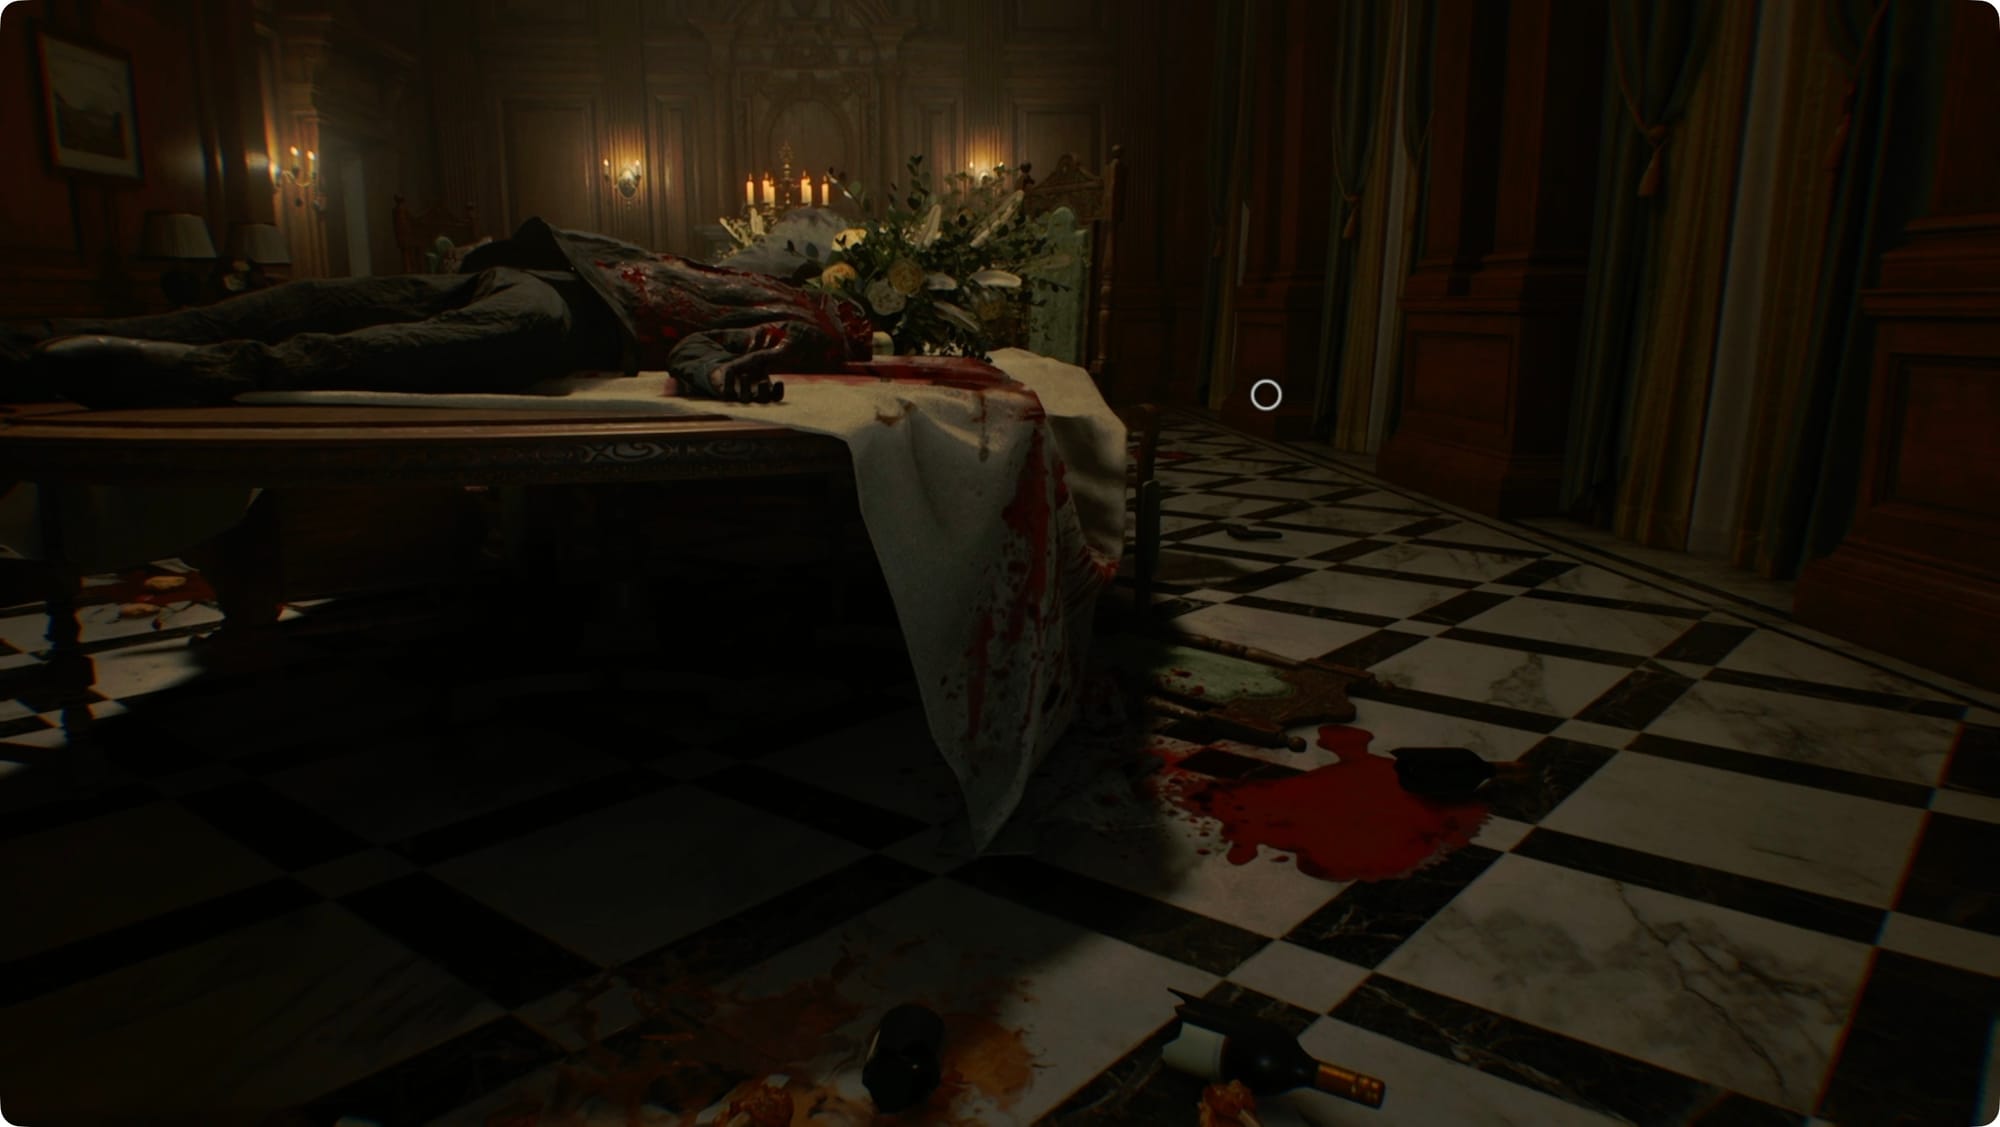
Last time, Grace escaped her rooms on the Care Center’s second floor. We’ll pick up from after she fixes the fuse box.
But first, boy, that sure is a nice custom 2026 Porsche Cayenne Turbo GT Leon drives, huh?
Leon — Care Center
After Leon gets his tour through the Care Center’s morgue(!?), and another quick product placement for his watch, things will go predictably sideways.
Before anything, make sure you’ve got a gun with ammo equipped — right on the D-pad. If you finished the last level with Requiem, you’ll probably be out of bullets.
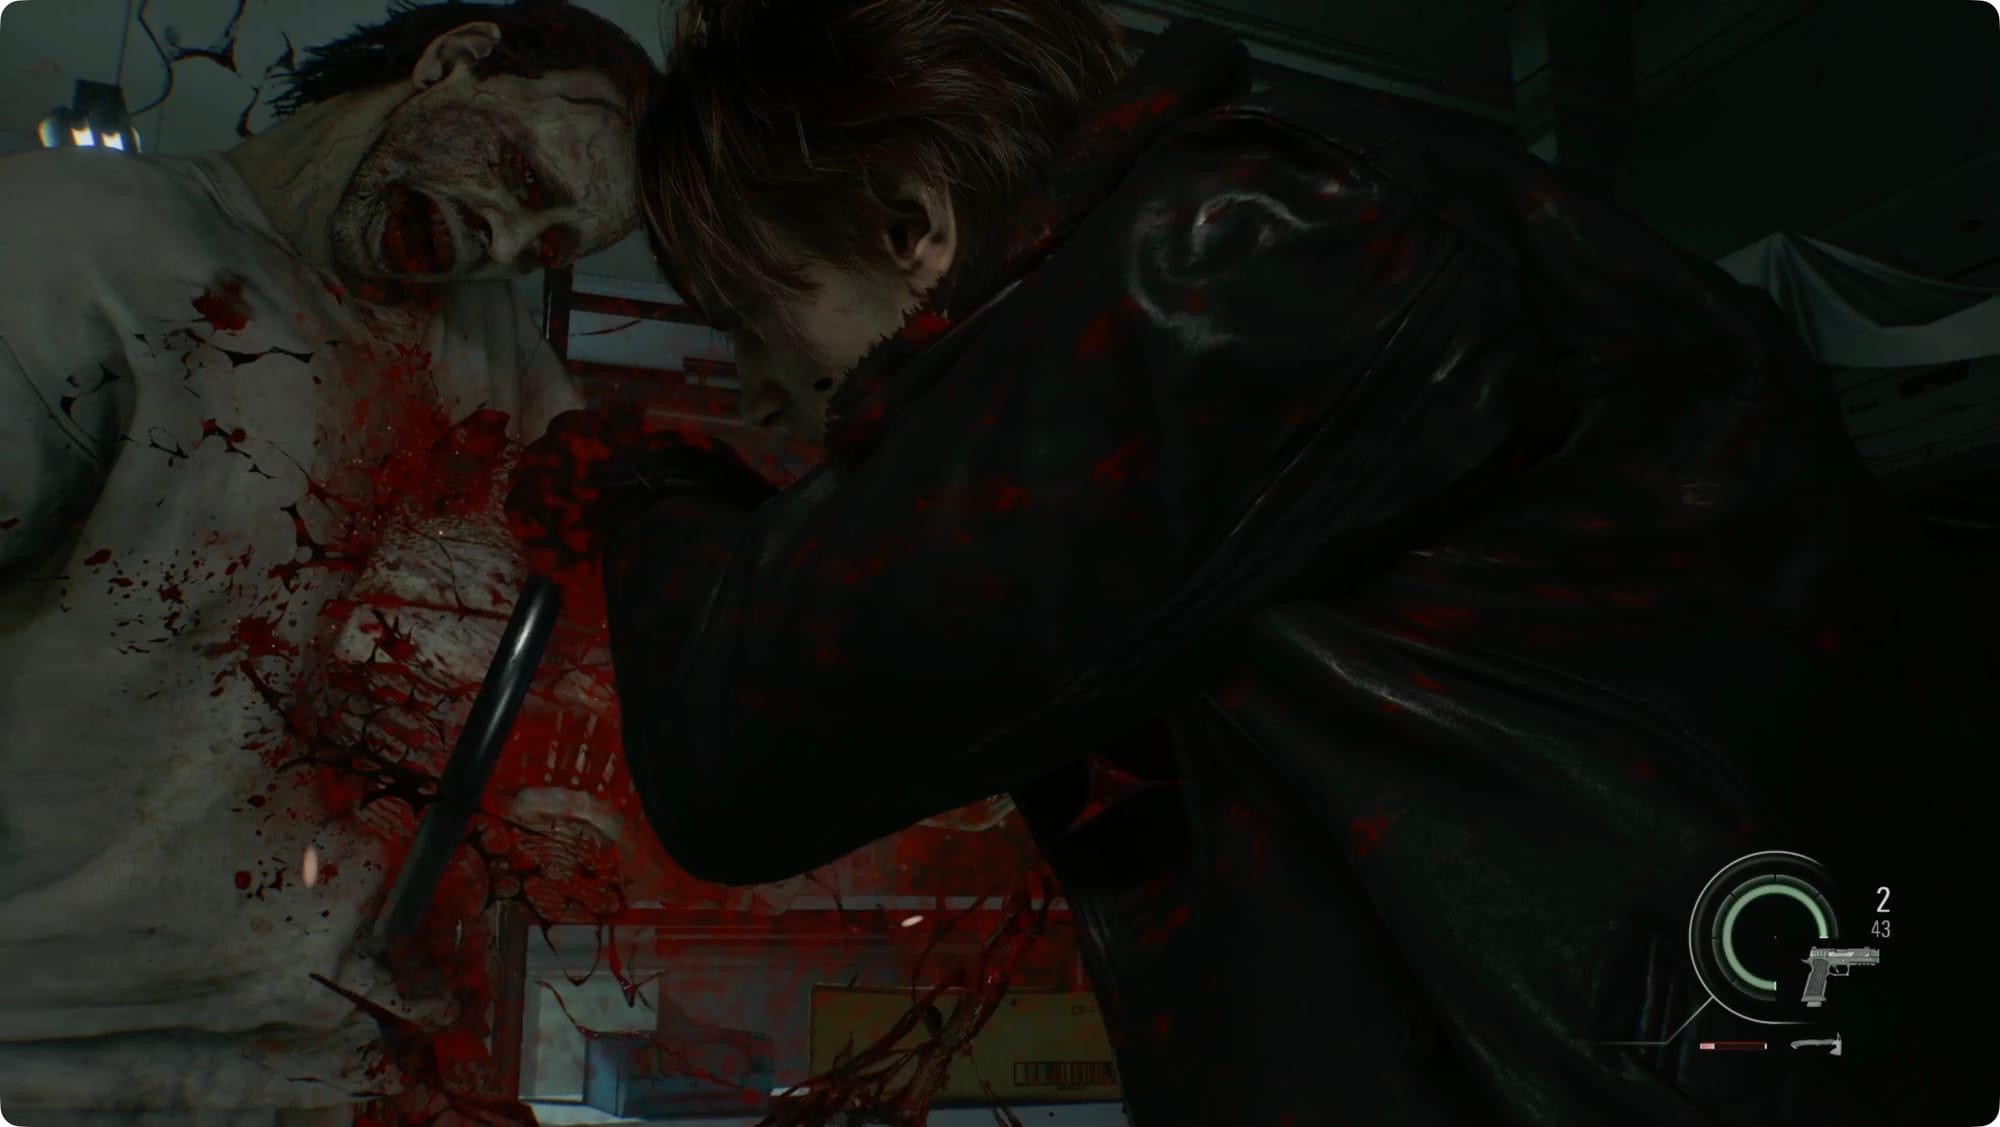
Next, you’re going to deal with a lot of zombies in this fight and they’re going to keep sneaking up behind you. Try to keep moving, but be prepared to mash A/Χ when one grabs you from behind. If you can get back into the office where you were waiting, you’ll have a better chance of getting your back against a wall.
Parrying chainsaw attacks with LB/L1 is nice, but you should still focus on skulls and kneecaps to conserve ammo. When a zombie drops the chainsaw (why does this doctor’s office have a whole-ass chainsaw anyway!?), try to stand clear of it until it stops spinning. If you can grab it, it’s a much better way to conserve ammunition.
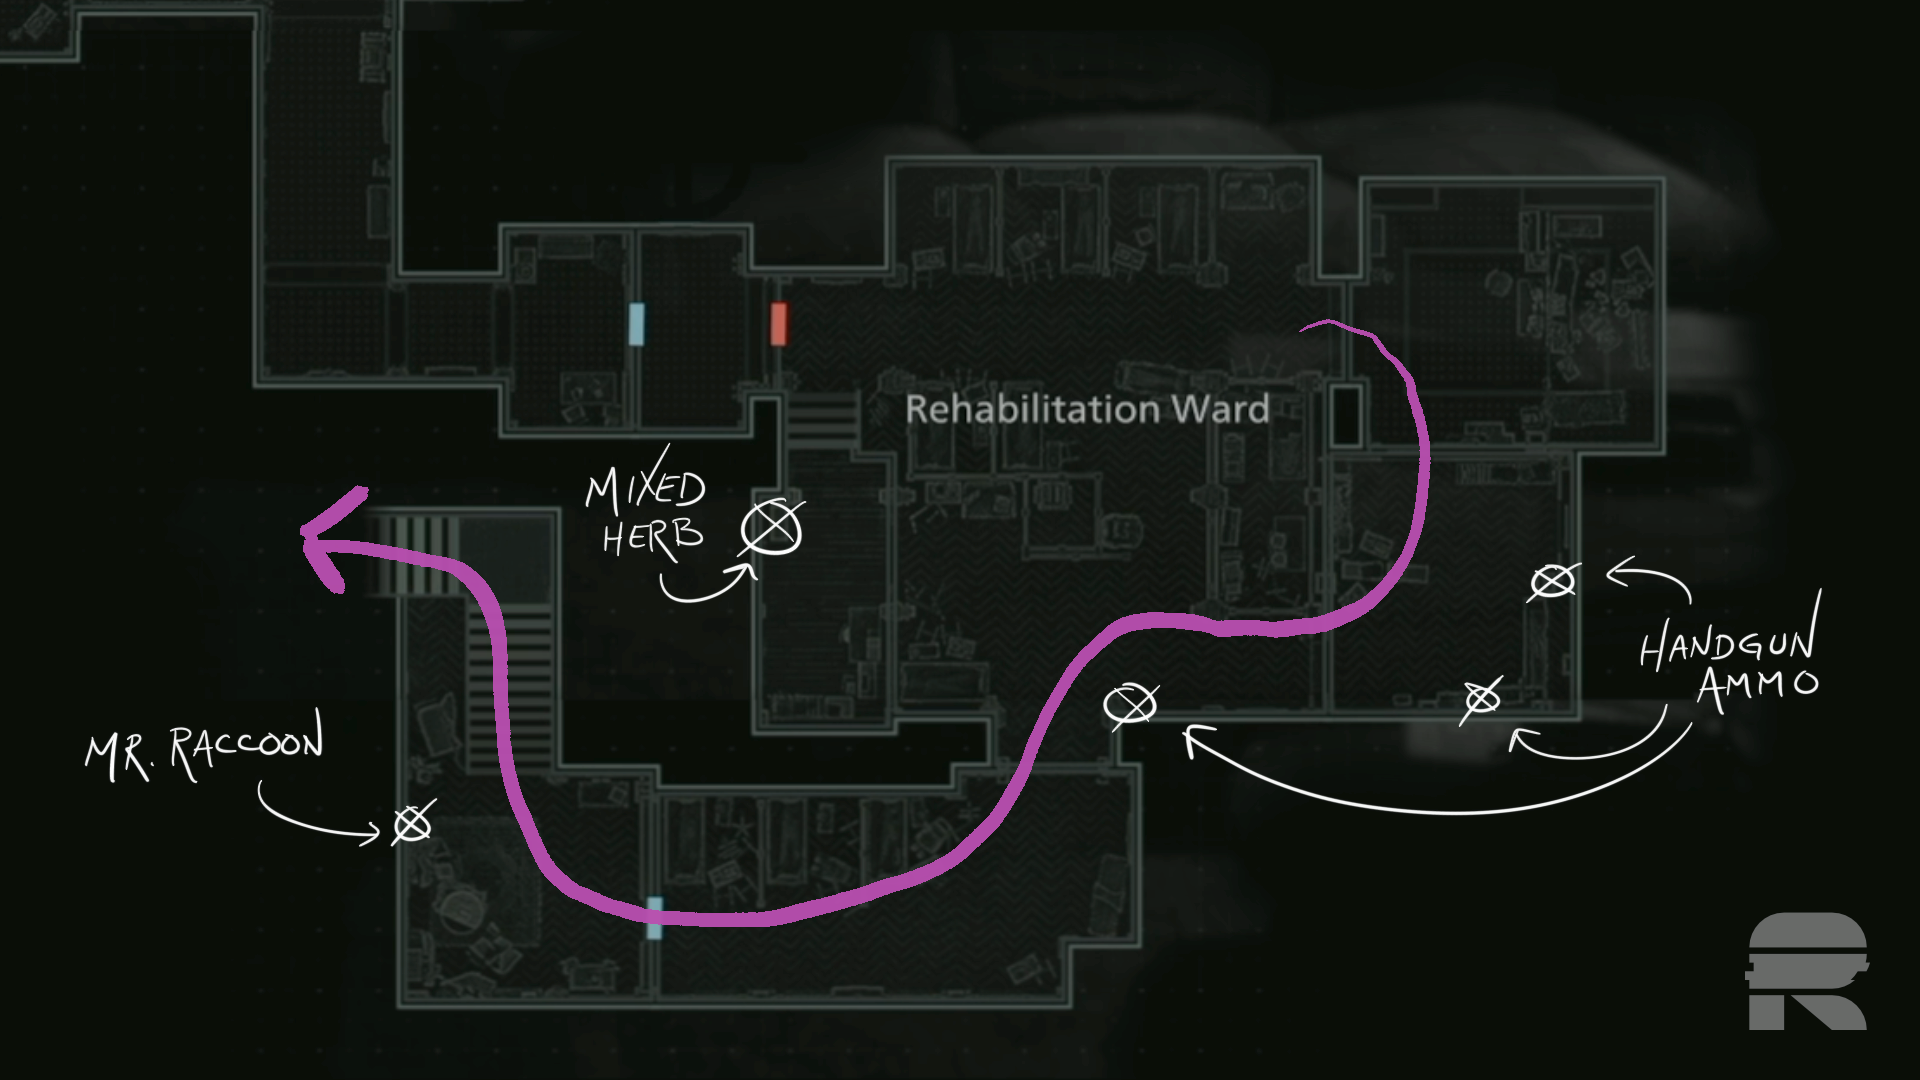
Once the shooting is done (Leon will quip about it to let you know it’s over), sweep the rooms for pickups. In the storage room to the southeast, there’s a crate with Handgun Ammo and then some more in a cabinet along the wall.
In the main room of the Rehabilitation Ward, there’s another crate with Handgun Ammo along the south wall. At the far side of the room, along the west wall, look for another cabinet with a Mixed Herb (G+G).
Go grab the chainsaw and use it to open the lock on the door along the south wall (which, I’m pretty sure, is not a thing you should do with a chainsaw). Take a right and follow the hall to a door.
When you push through, you’ll see and hear the first Mr. Raccoon. Shoot it or smash it to start the hunt. (I missed the screenshot of it.) Head up the stairs.
Keep following the only path you have upstairs until you come out in the Central Hall. Take a right.
Grace — West Wing
After Leon magically manifests a bunch more bullets for Requiem, Grace will end up trapped in the Central Hall with one bullet left.
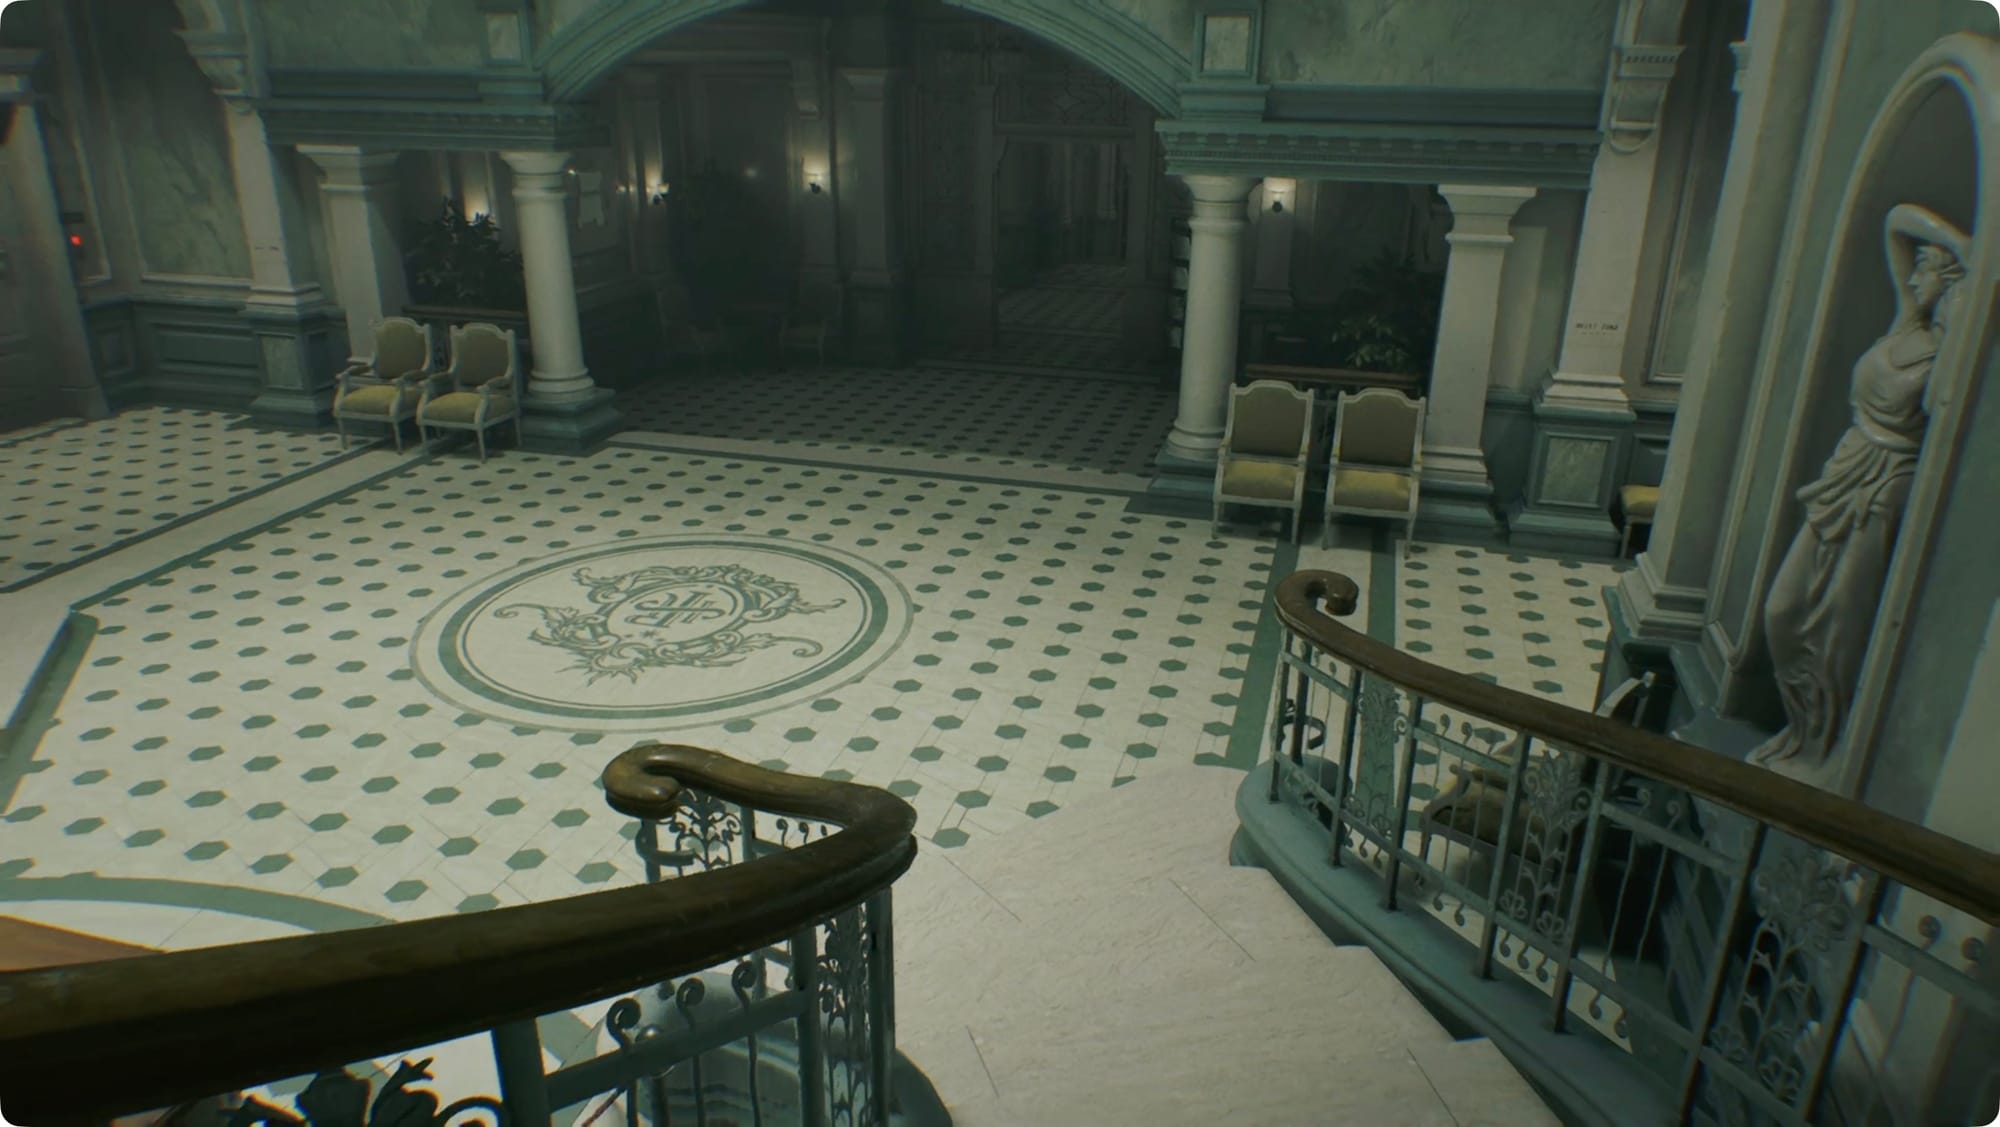
Head down the stairs on the right side. Check the main door — Door with Indents — for a clue (Sun, Moon, Star) about what you’re looking for. The door at the top of the other staircase is locked, so keep heading down to the main floor.
The doors to the East and West Wings are locked, so keep going straight (south). Down a couple more stairs, there’ll be a useless map on the wall to your left and a door to the right. Head through to find your next safe room.
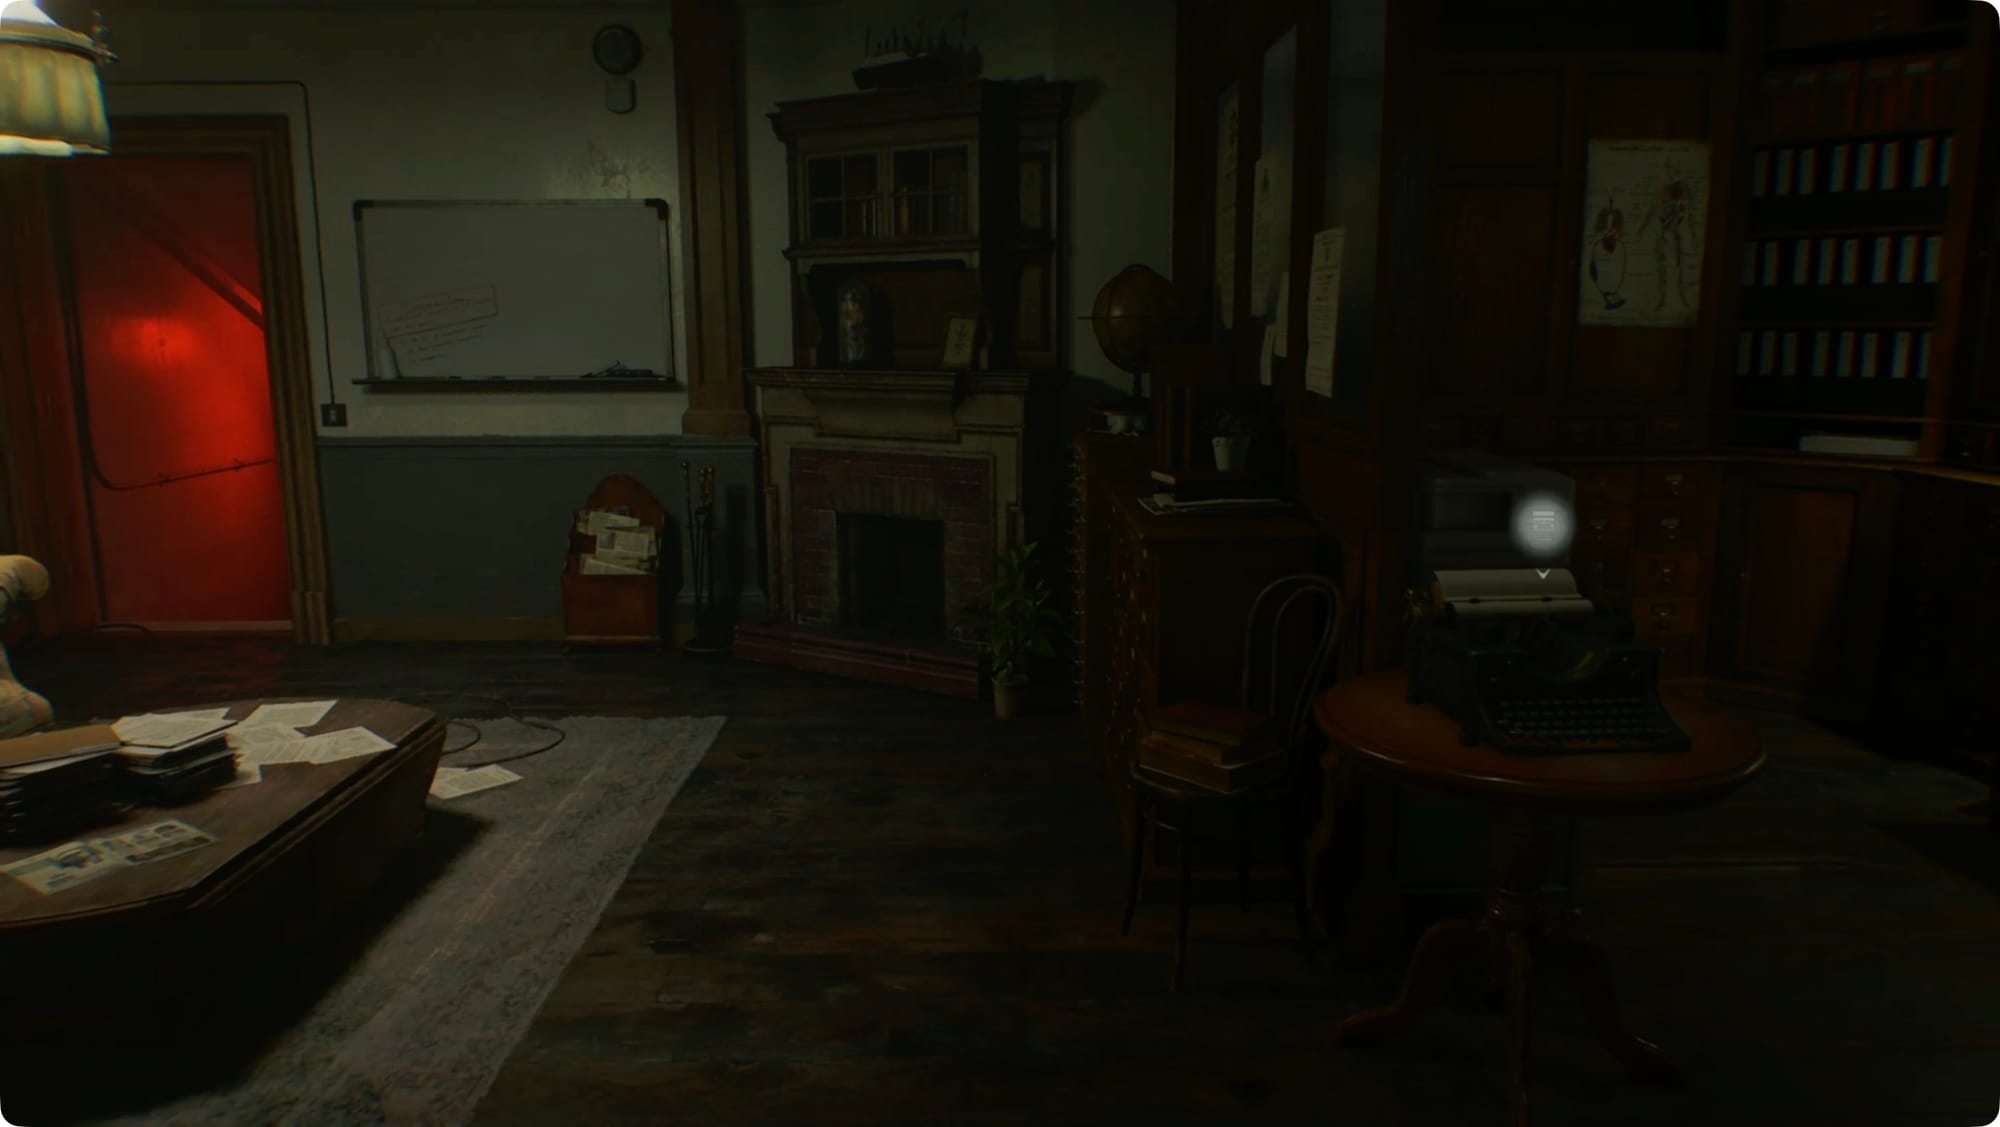
To the right, grab the Antique Coin from the computer desk. You’ll also find the Item Box where you can dump anything you don’t want to carry. To the left, grab the Care Center Pamplet for a clue to the door — Mitchell Bennet is the Moon, Anthony Richardson is the Sun, and Luke Clark is the Star (I don't know if this'll come up again, but I thought I should I write it down).
Grab the Green Herb next to the fireplace, and check the whiteboard on the wall for the Whiteboard Scrawl. Go down the stairs. After the cutscene, you’ll have a new flashlight and the West Wing Keycard.
West Wing
Something something Aaron Sorkin.
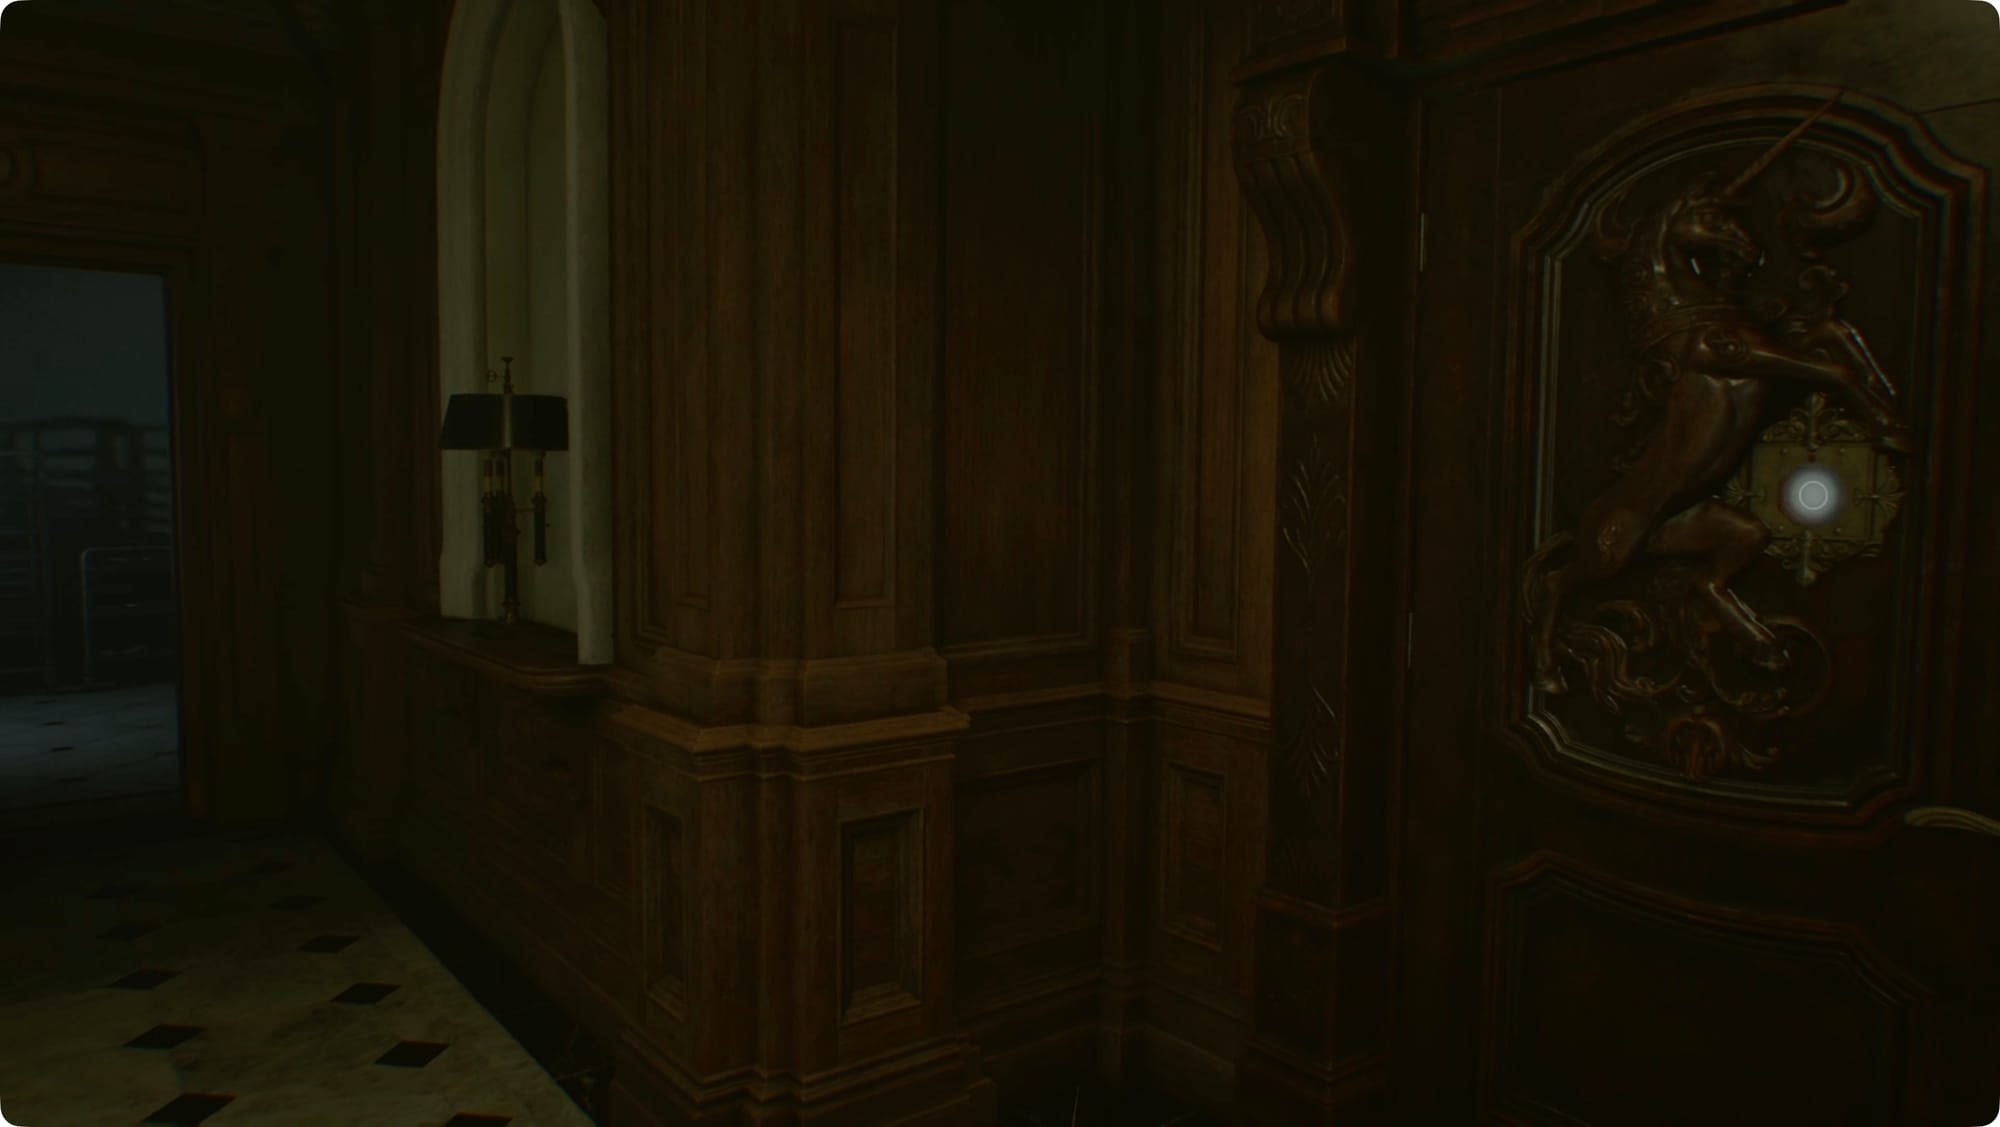
Head back to the Central Hall and take a left to the West Wing Door. In the next hallway, take a left. You’ll pass another door with indents that I’ll call the Unicorn Door. Keep going past it.
Around the corner, there’s Security Point Lv. 1 door you can’t open yet to the left. Head through the door ahead of you into the Kitchen.
Kitchen
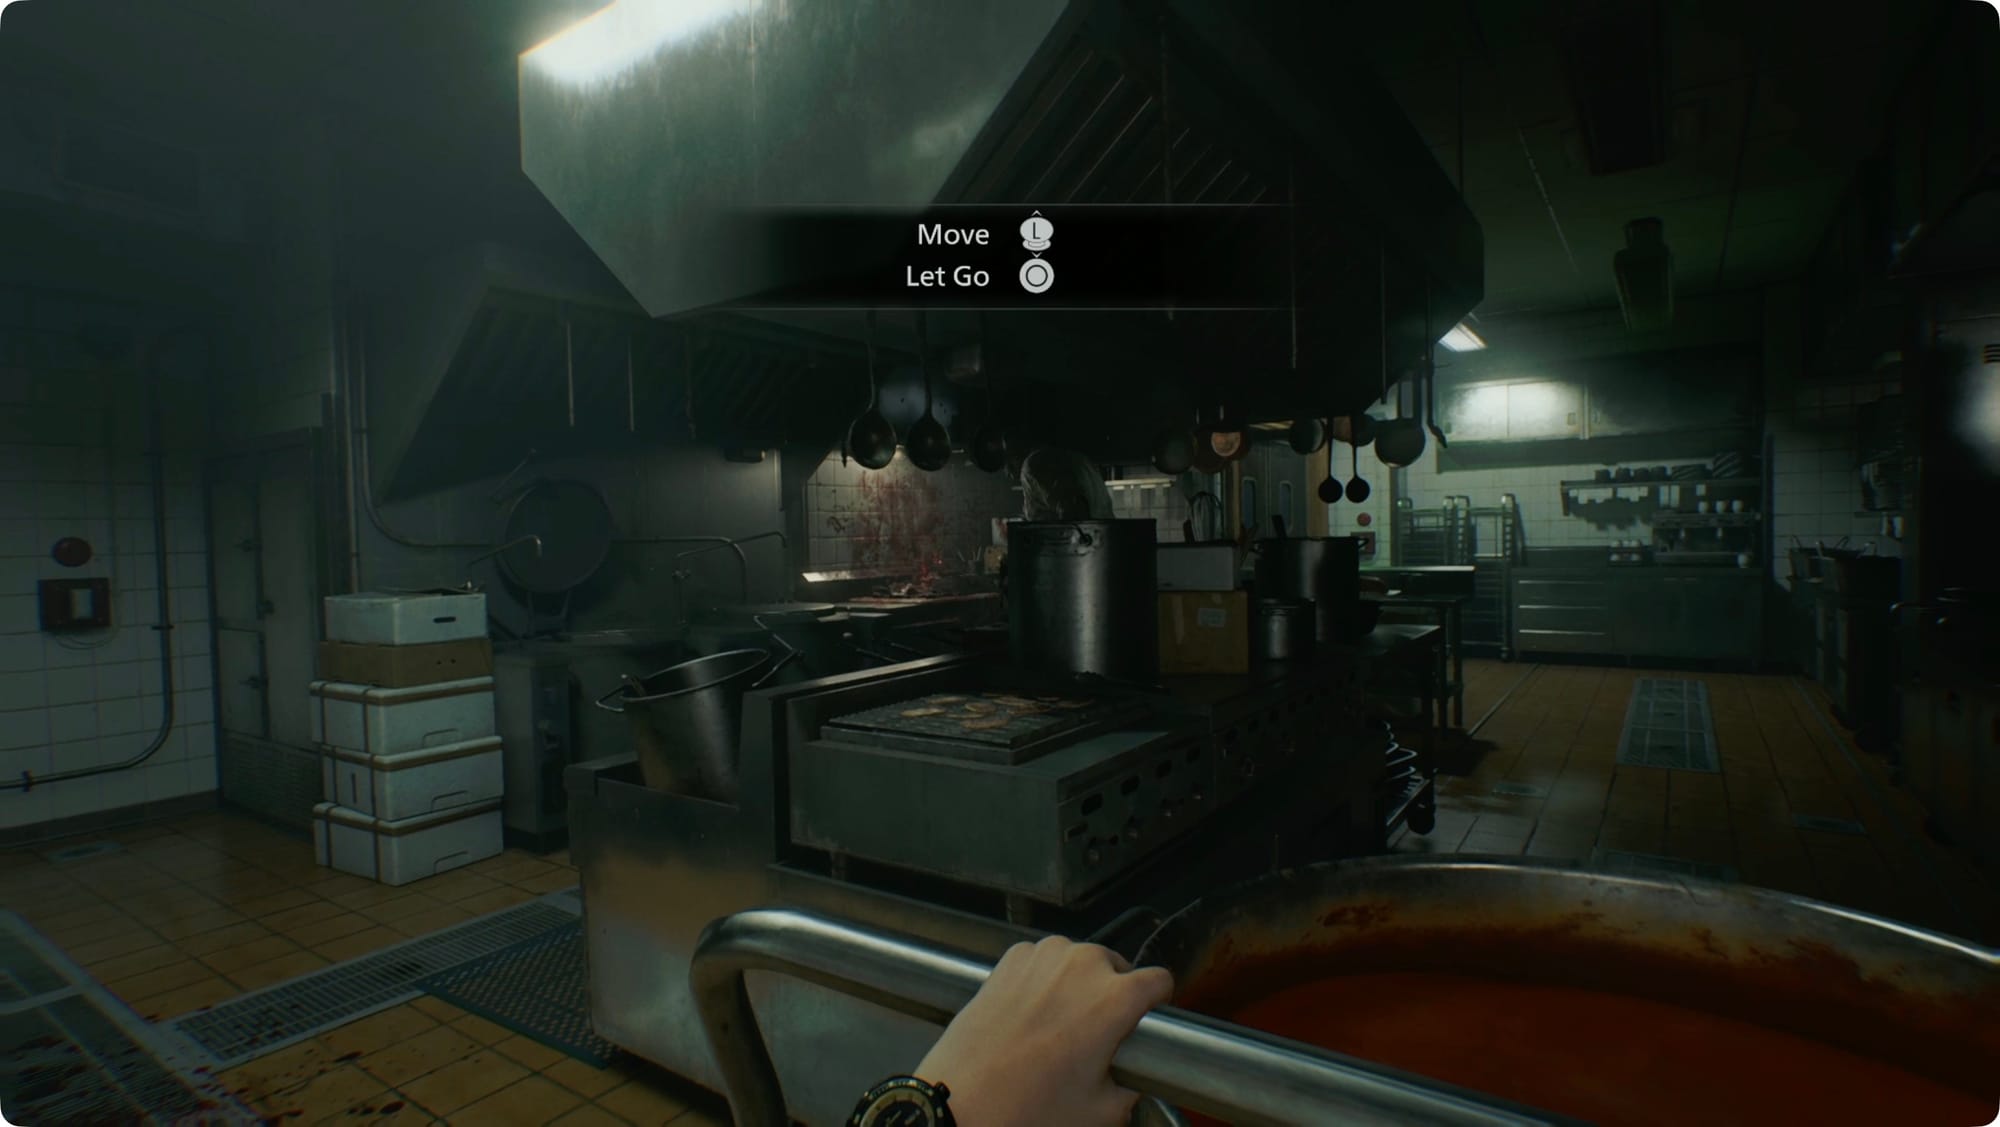
Hey look! Another new friend.
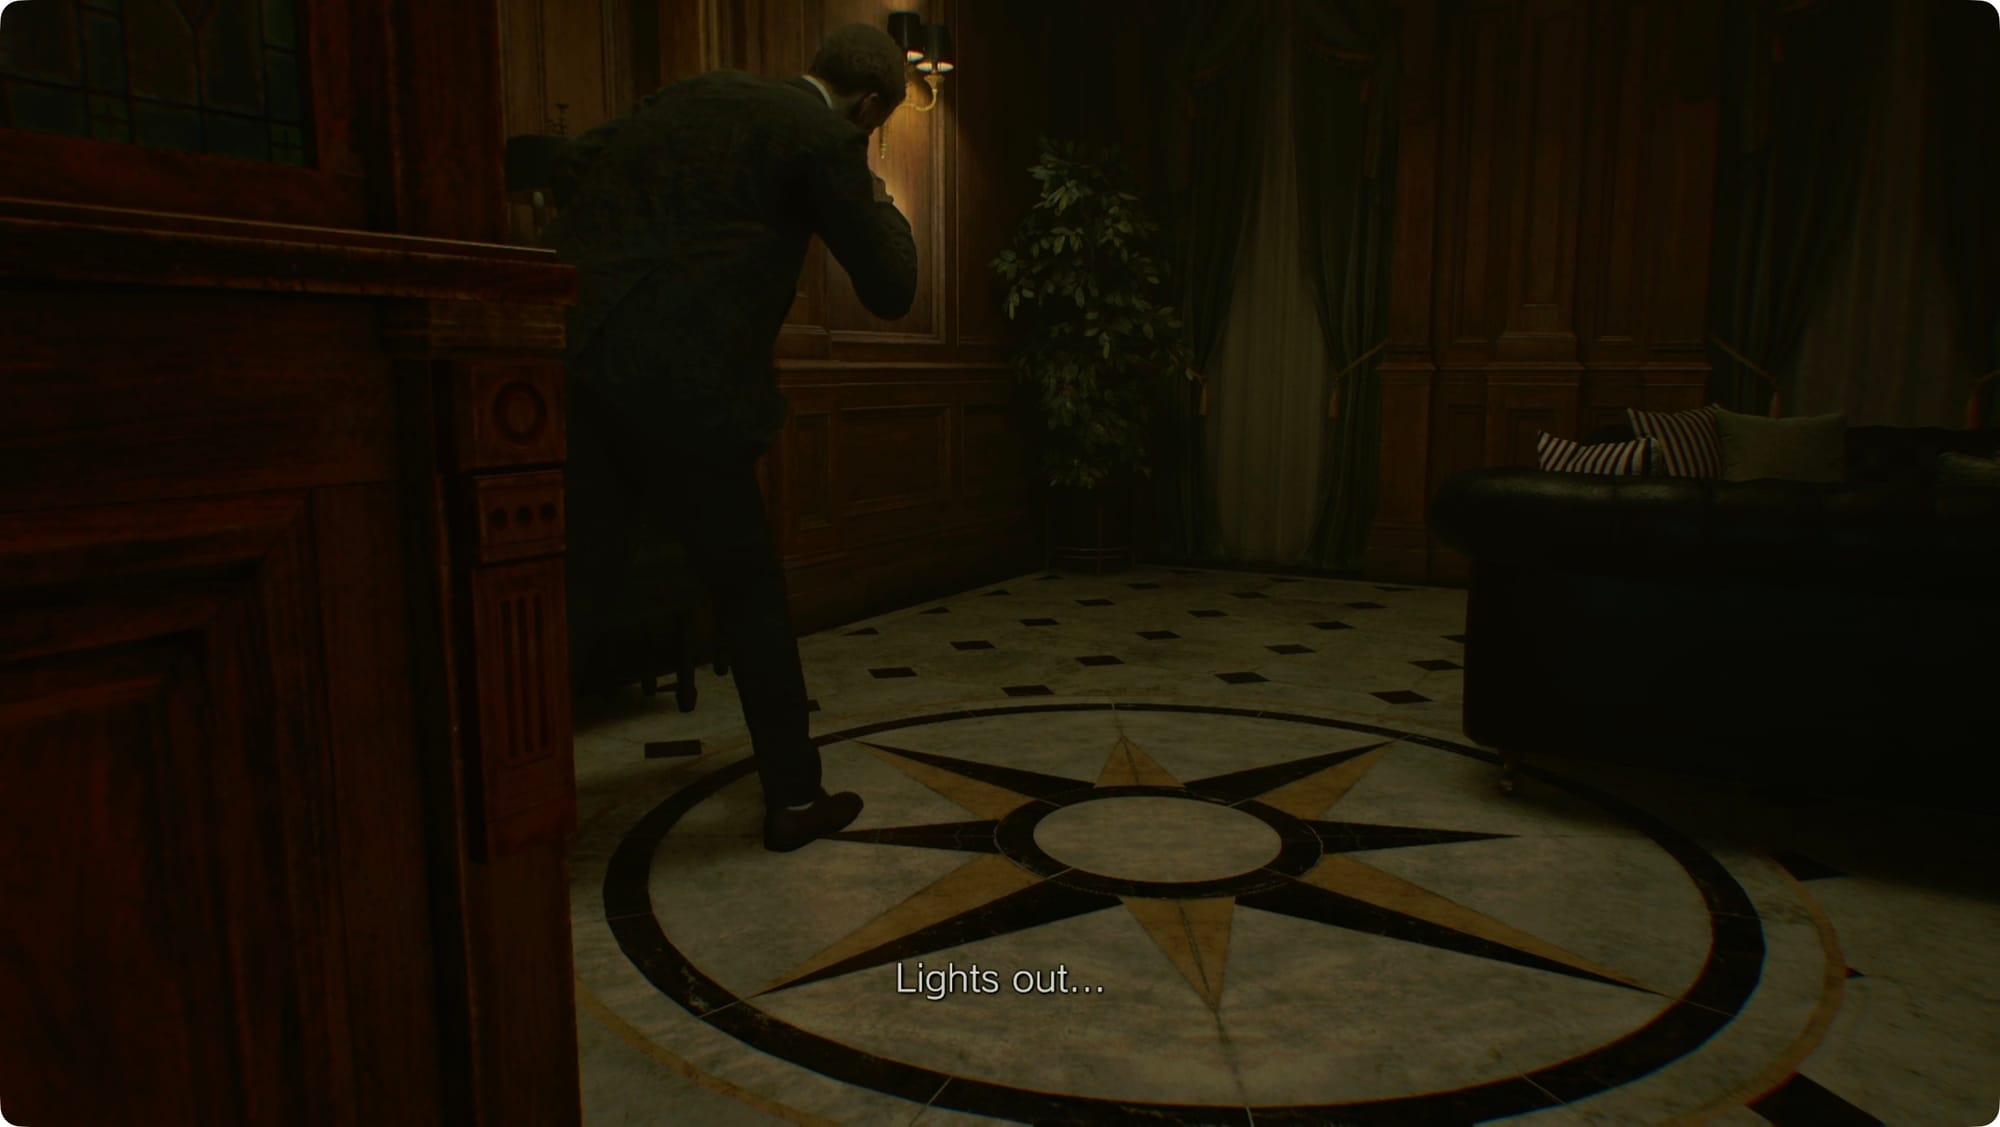
Crouch down and turn off your flashlight. The door to your left is locked, so we’re trying to get to the door on the opposite side. Your new friend is in the way, thought.
Don’t bother shooting the butcher, it’ll just make him mad. Instead, wait for him to go to the far side of the room. Sneak left, loop around to the right, and grab the cart with the slop bucket. While he’s hacking away, back up with the cart. When you hear him say, “Next is …,” hide and wait for him to return to his butchering.
When you get it back against the wall, sneak to the left. When he comes to grab more meatslop, loop around to the left keeping the counter between you. You should have enough time to get out the door.
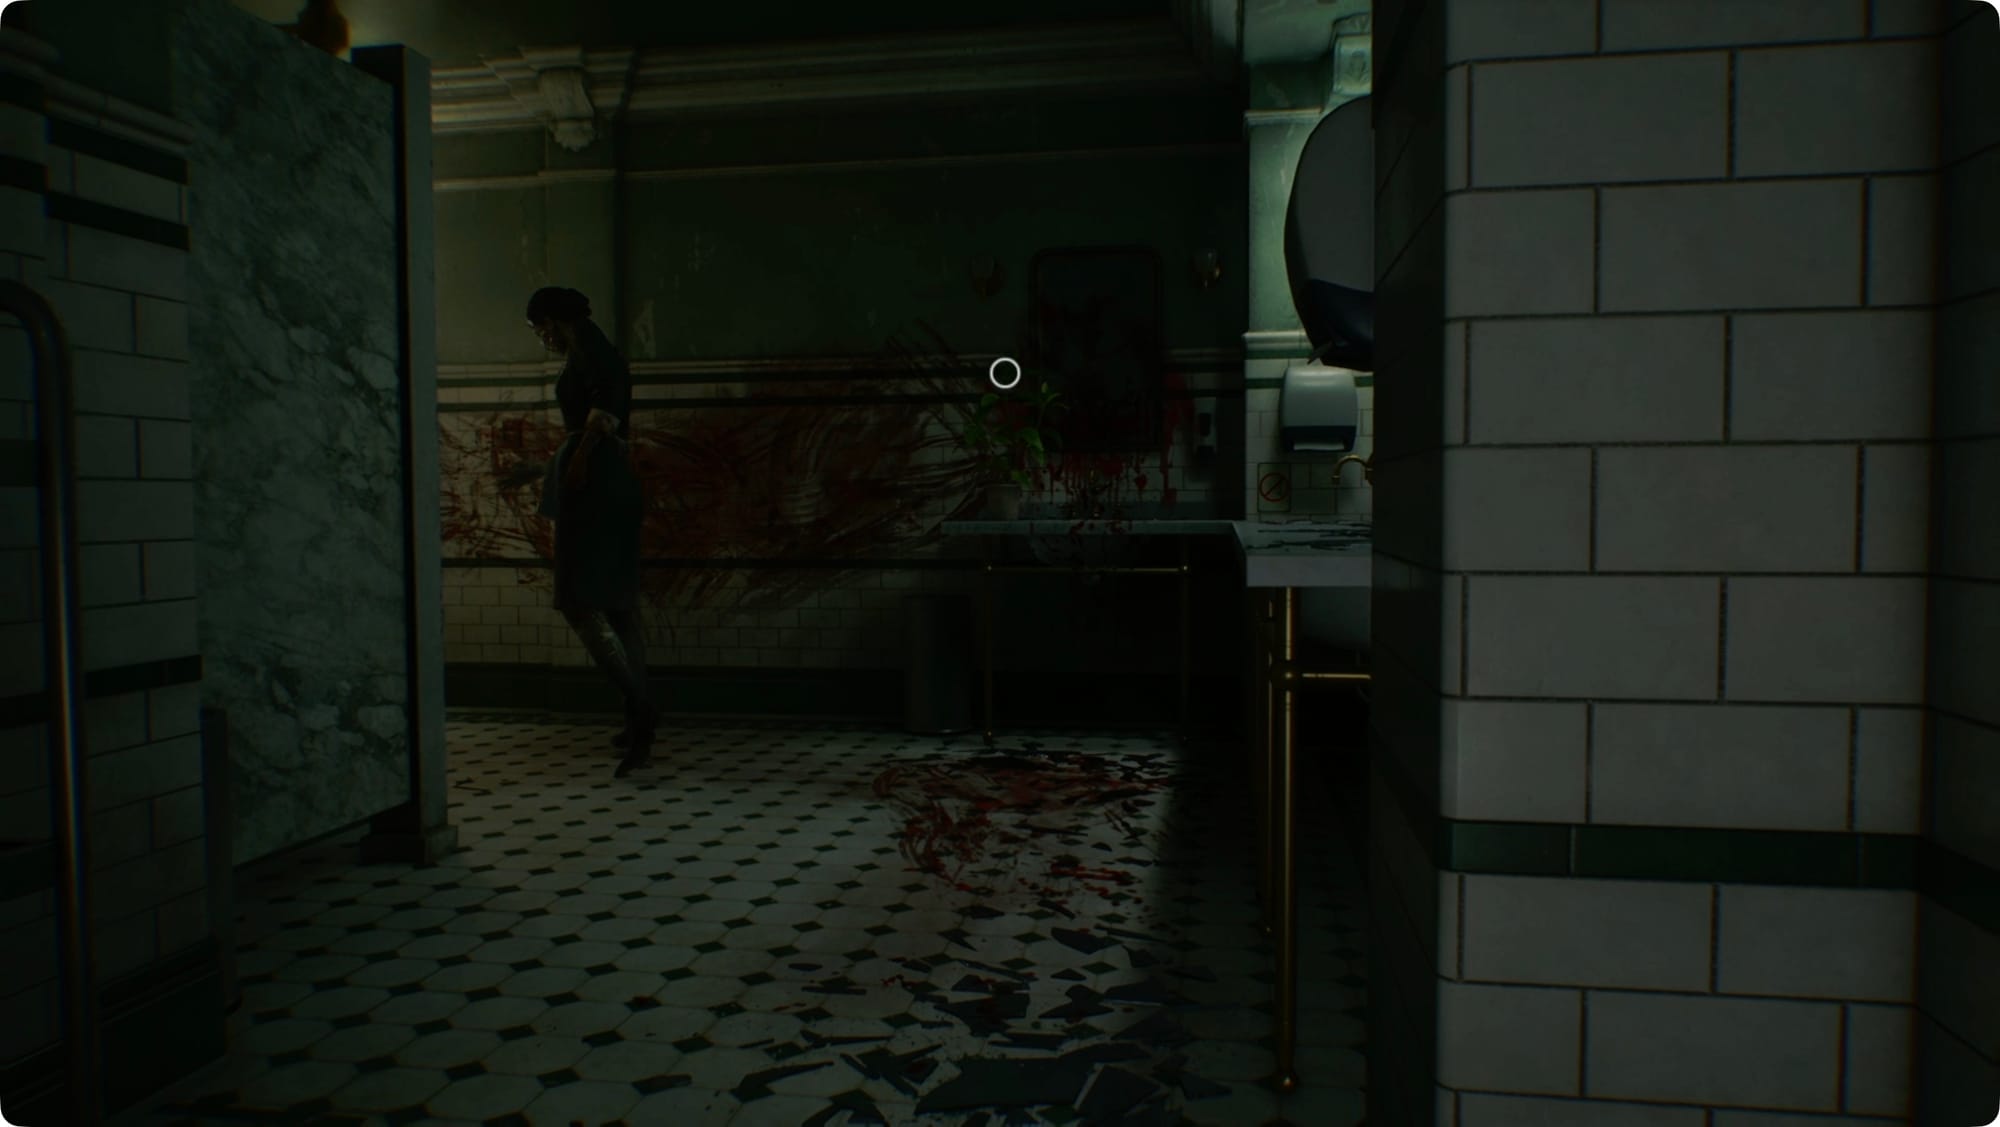
In the next hall, take the left. The first door on the right is a bathroom with a zombie cleaning lady inside doing a Lady Macbeth. Wait for her to stop “cleaning” the mirror and sneak inside. While she’s busy at the back of the room, sneak in and grab the Green Herb directly ahead of you. That’s all there is to grab, so sneak back out before she sees you.
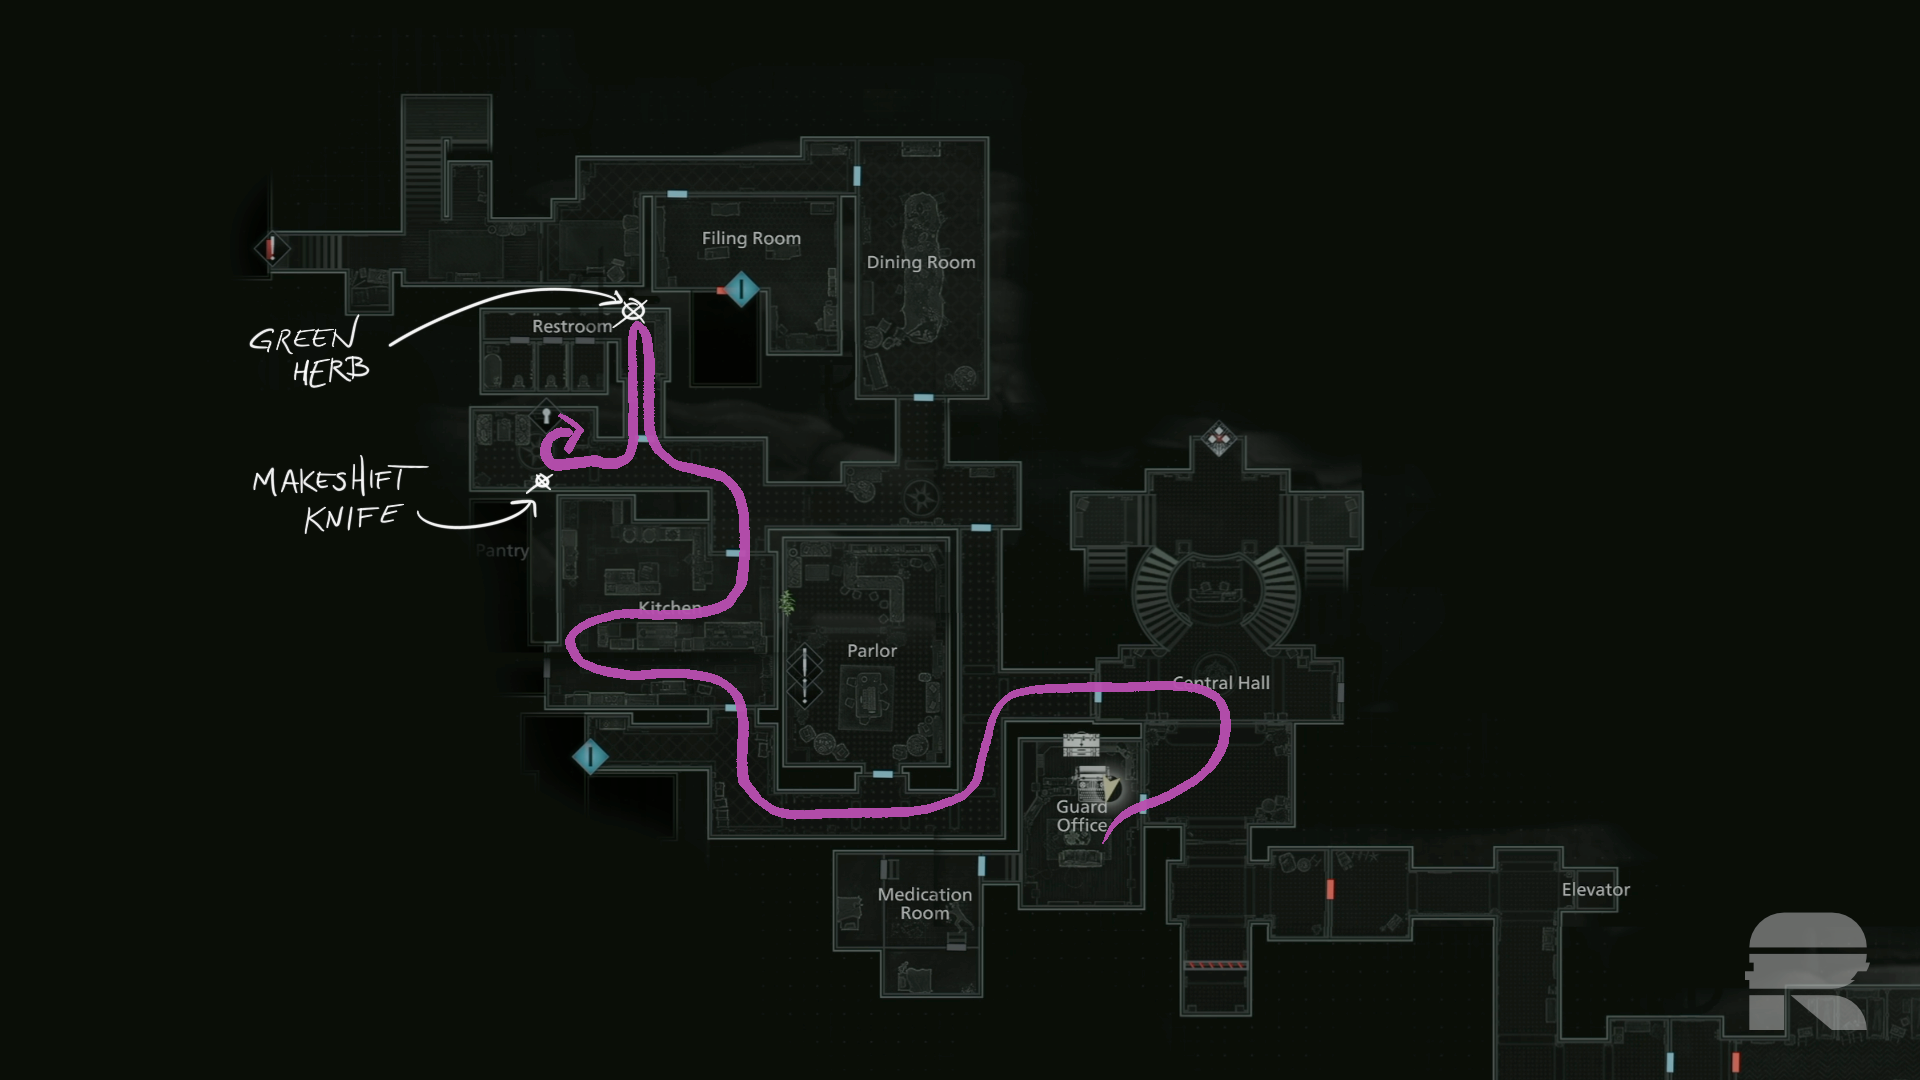
Take a right as you leave. At the end of the hall, grab the Makeshift Knife from the table on your left. There’s a locked drawer here, but we can’t do anything about it yet.
At the far end of the hall, there’s a zombie who’s obsessed with keeping the lights off. That’s actually how you’ll get around him. To the right of where you got the knife, there’s a light switch on the wall. Turn it on, and then duck behind the divider to your left. Wait for the zombie to come turn it off, and then sneak past him.
Filing Room
Back past the kitchen, you’ll find a Green Herb on the right side. You can also unlock the door back to the Central Hall here. It’s worth it to run back and save (and dump some crap in your Item Box).
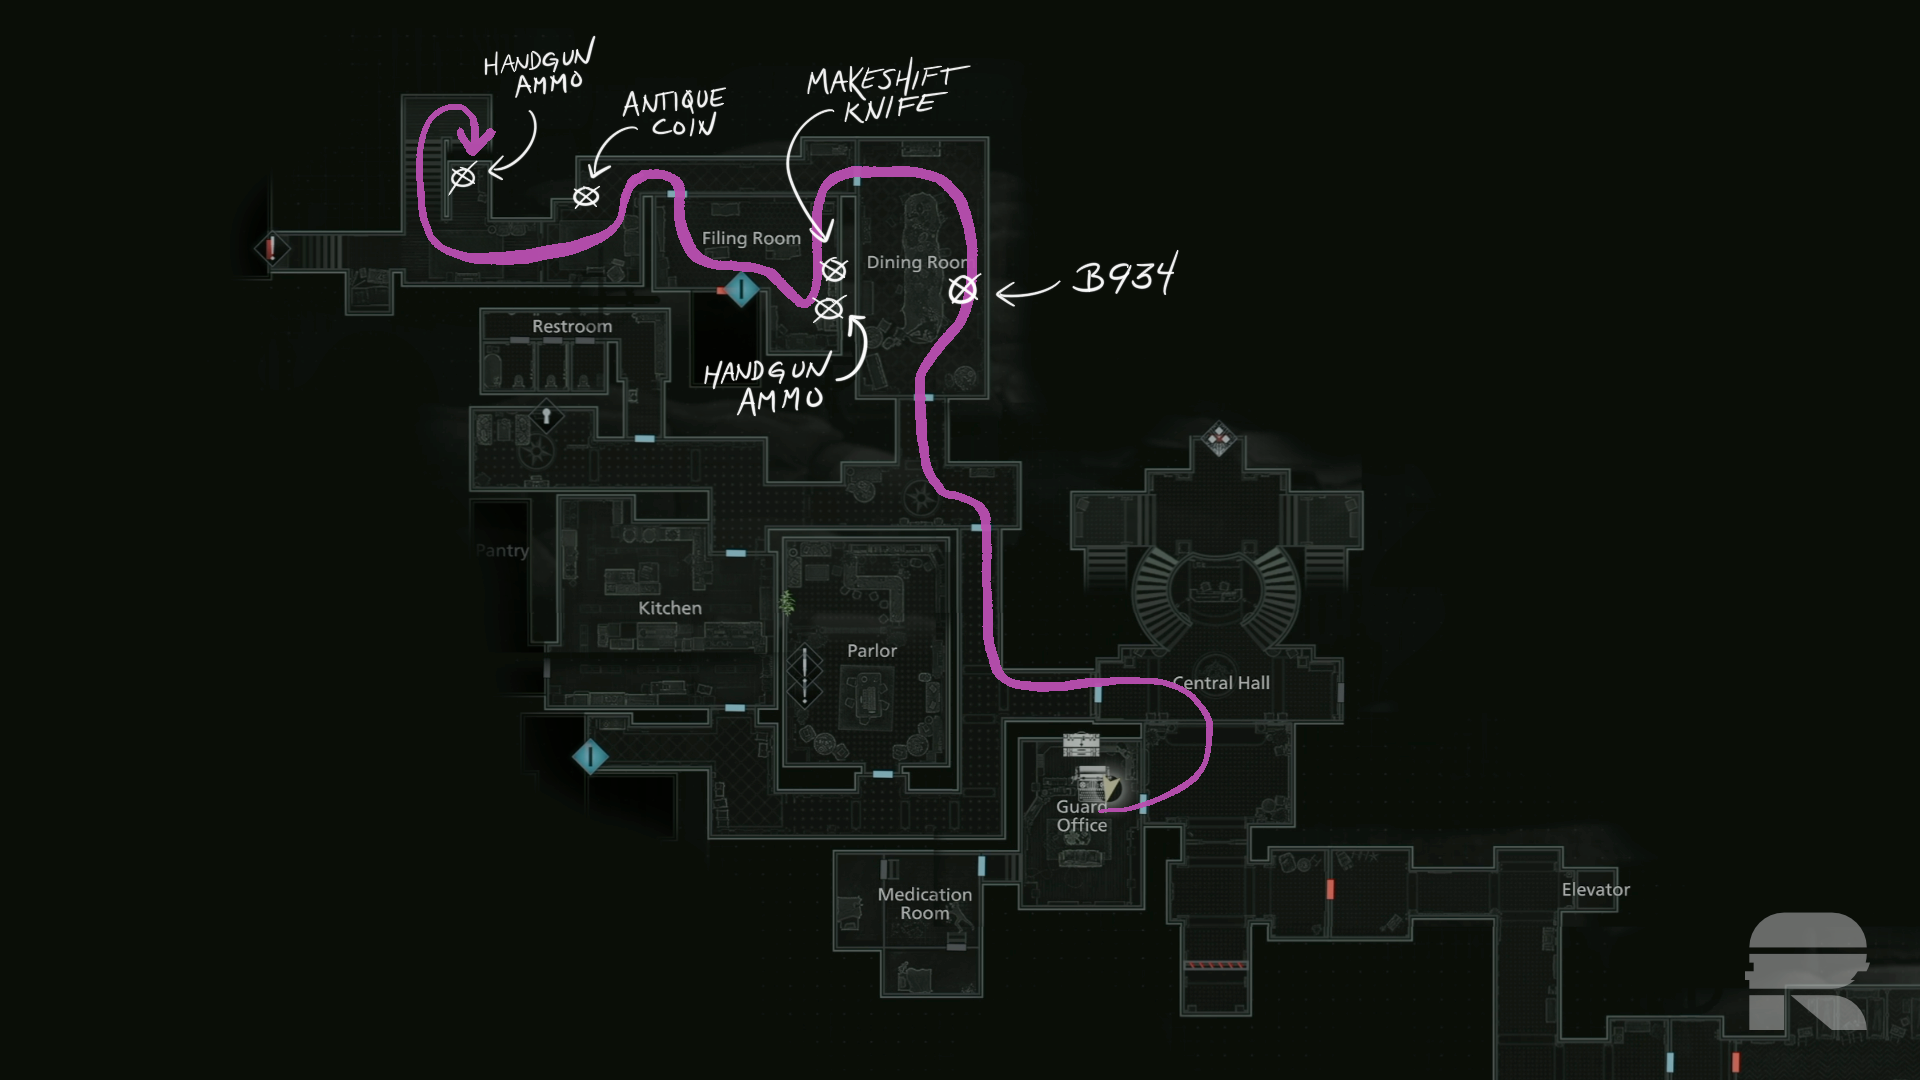
Back where you were, crouch and take the door on the left. There’s zombies inside, but they’re mostly distracted for now.
Cut to the right, and grab the B934 handgun from the floor. As you keep pushing forward, a zombie will crawl out from under the table. There’s nothing you can do about him right now and you don’t have any bullets, so keep going forward and through the door on the left.
In the hall, jump through the smashed window on your left. Grab another Makeshift Knife out of the first locker and then the Handgun Ammo from the desk. Reload the B934 you just grabbed, and wait for the zombie to fall through the window.
You only have two shots, so you’ve got to make them count. Kneecap him, melee him, and put the other in his head. That should finish him off. If it doesn’t, you’ll need to use one of your Makeshift Knives.
Grab his Hunting Knife and equip it.
Chairman’s Office
Leave the Filing Room through the window or door and take a left. Grab the Antique Coin from the table as you pass. Just before the stairs, there’s a crate with some more Handgun Ammo. Which is nice, because there’s another zombie coming down the stairs. It’s only a handful of bullets, and you’ll probably need most of them to take him out.
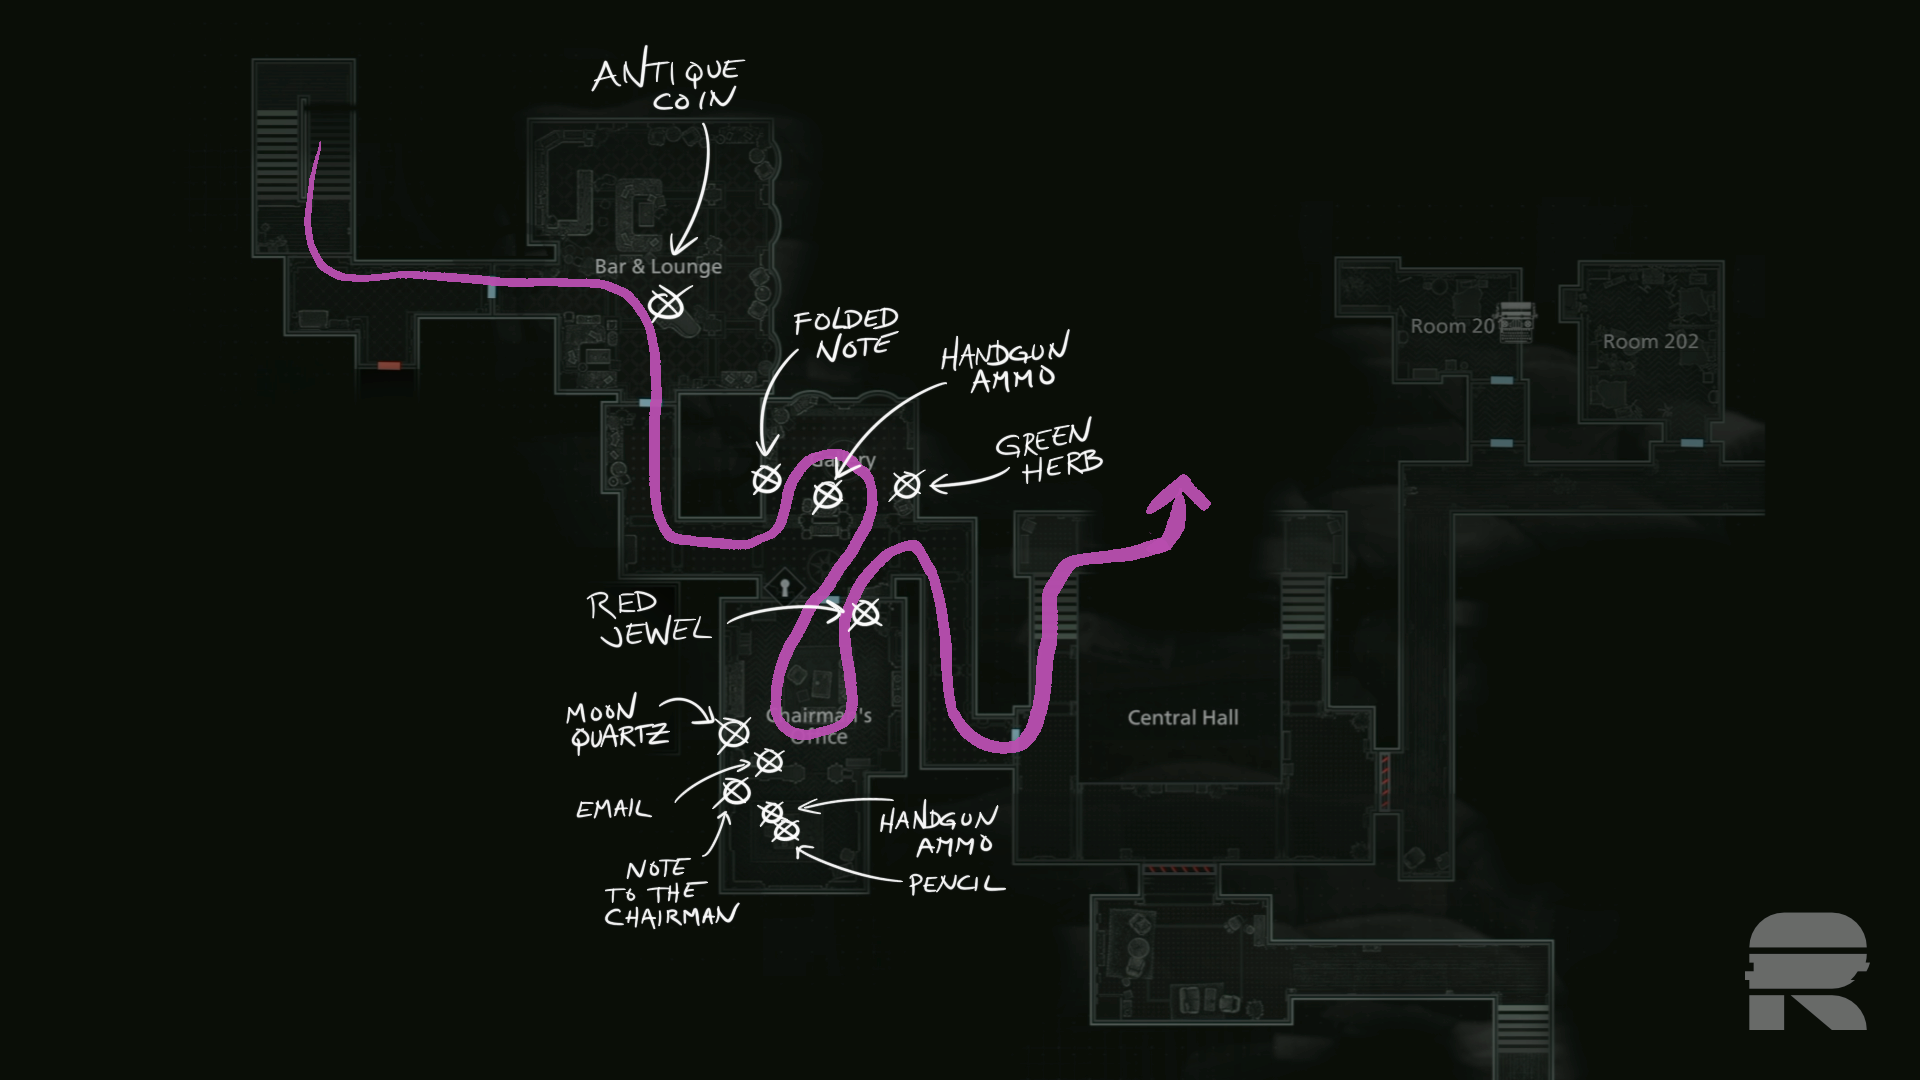
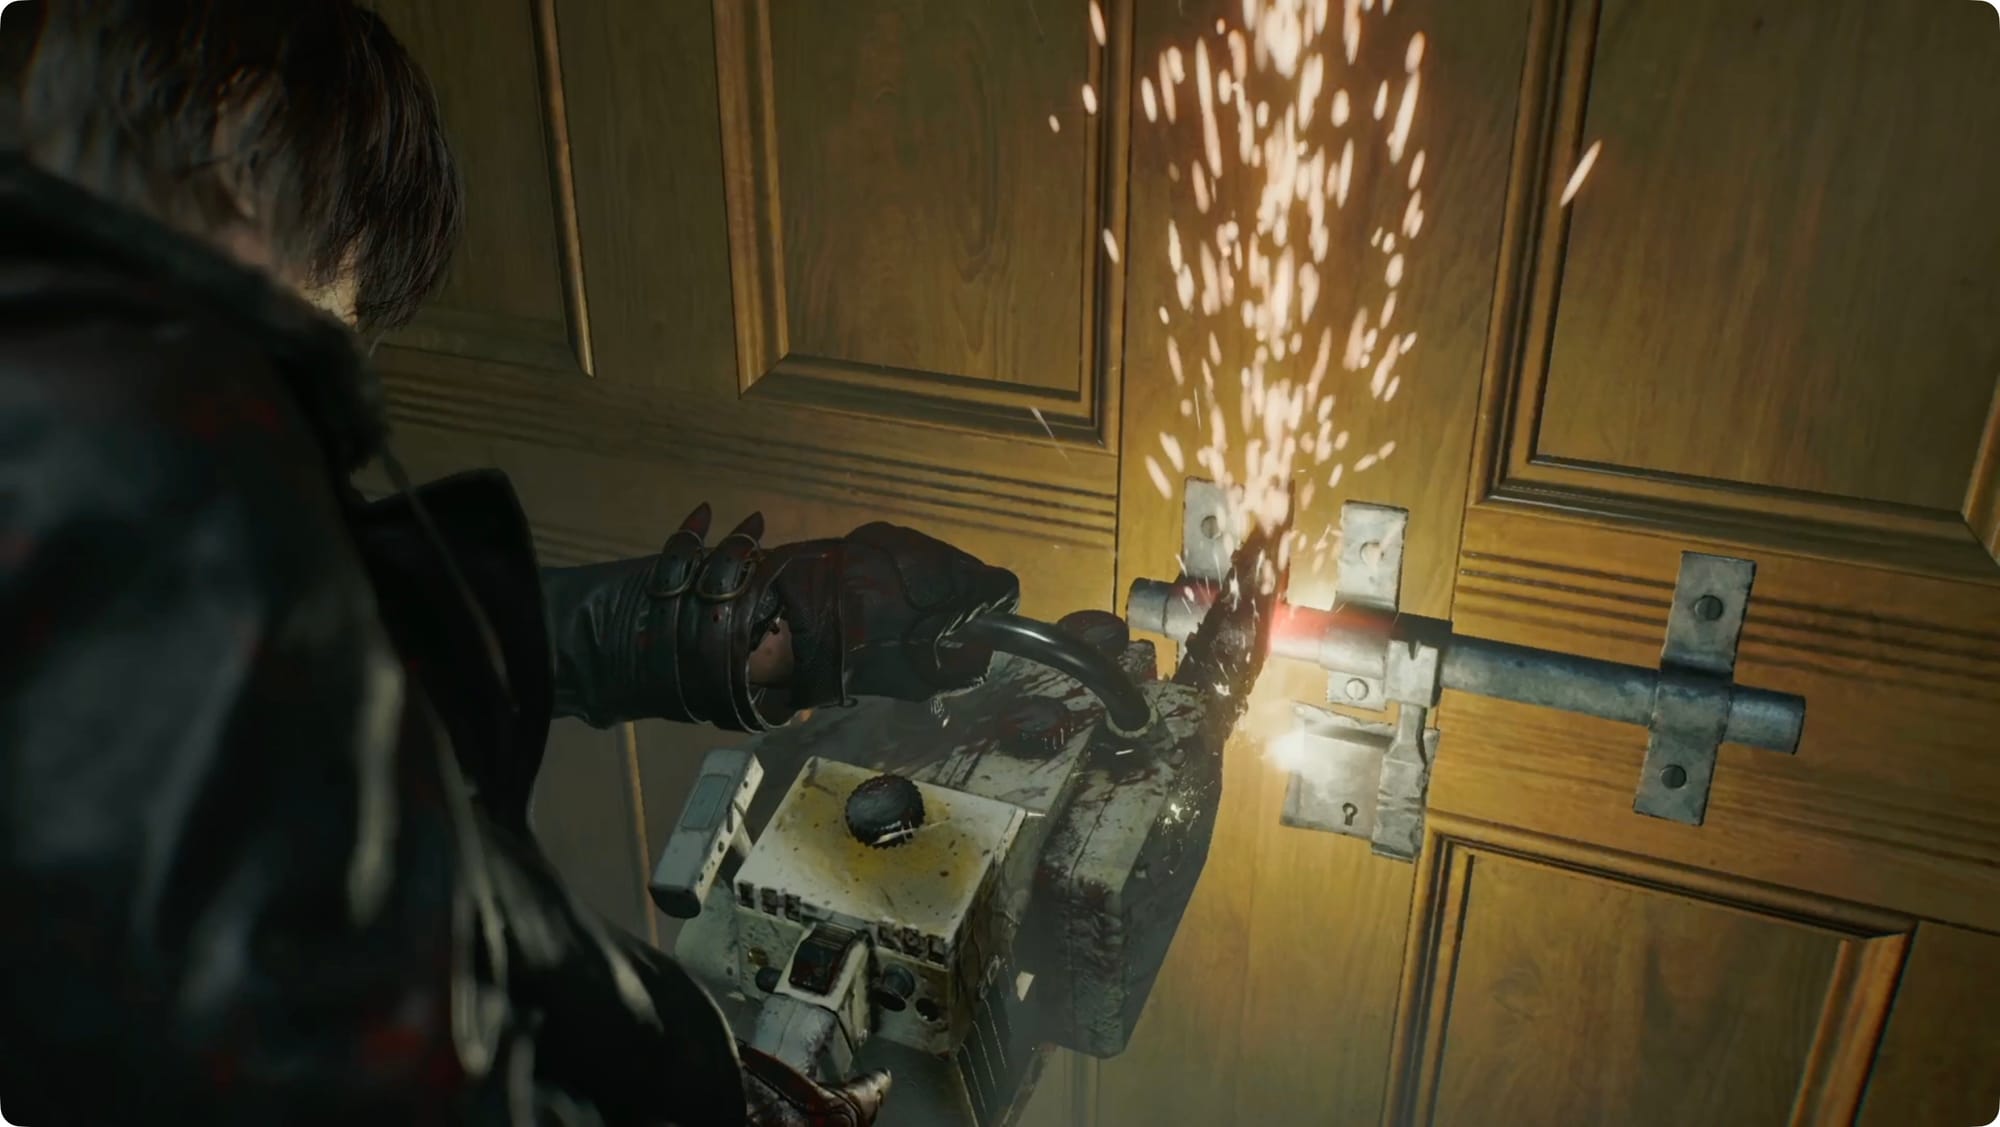
Keep heading straight (west) and go break the handle off the door (yay, video games!). Head upstairs.
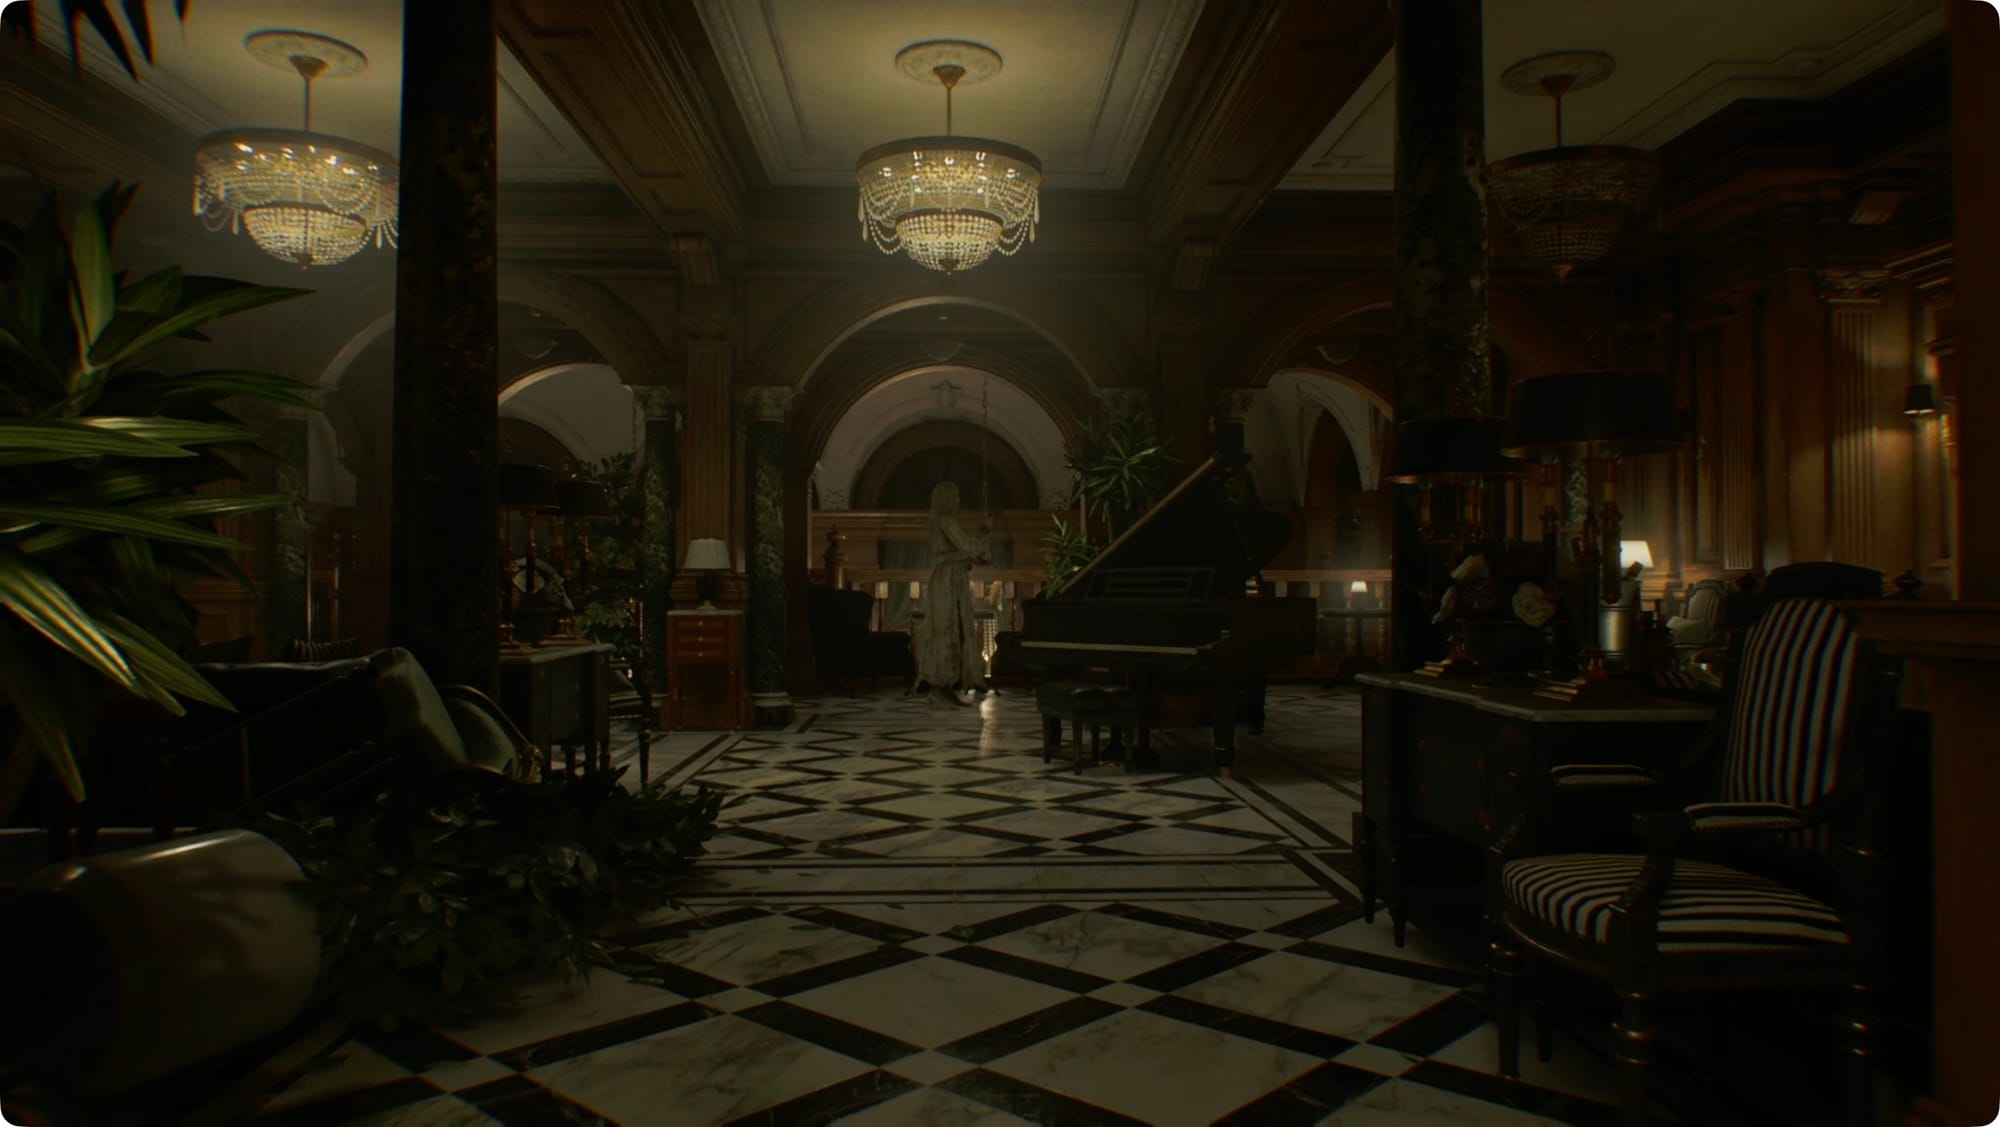
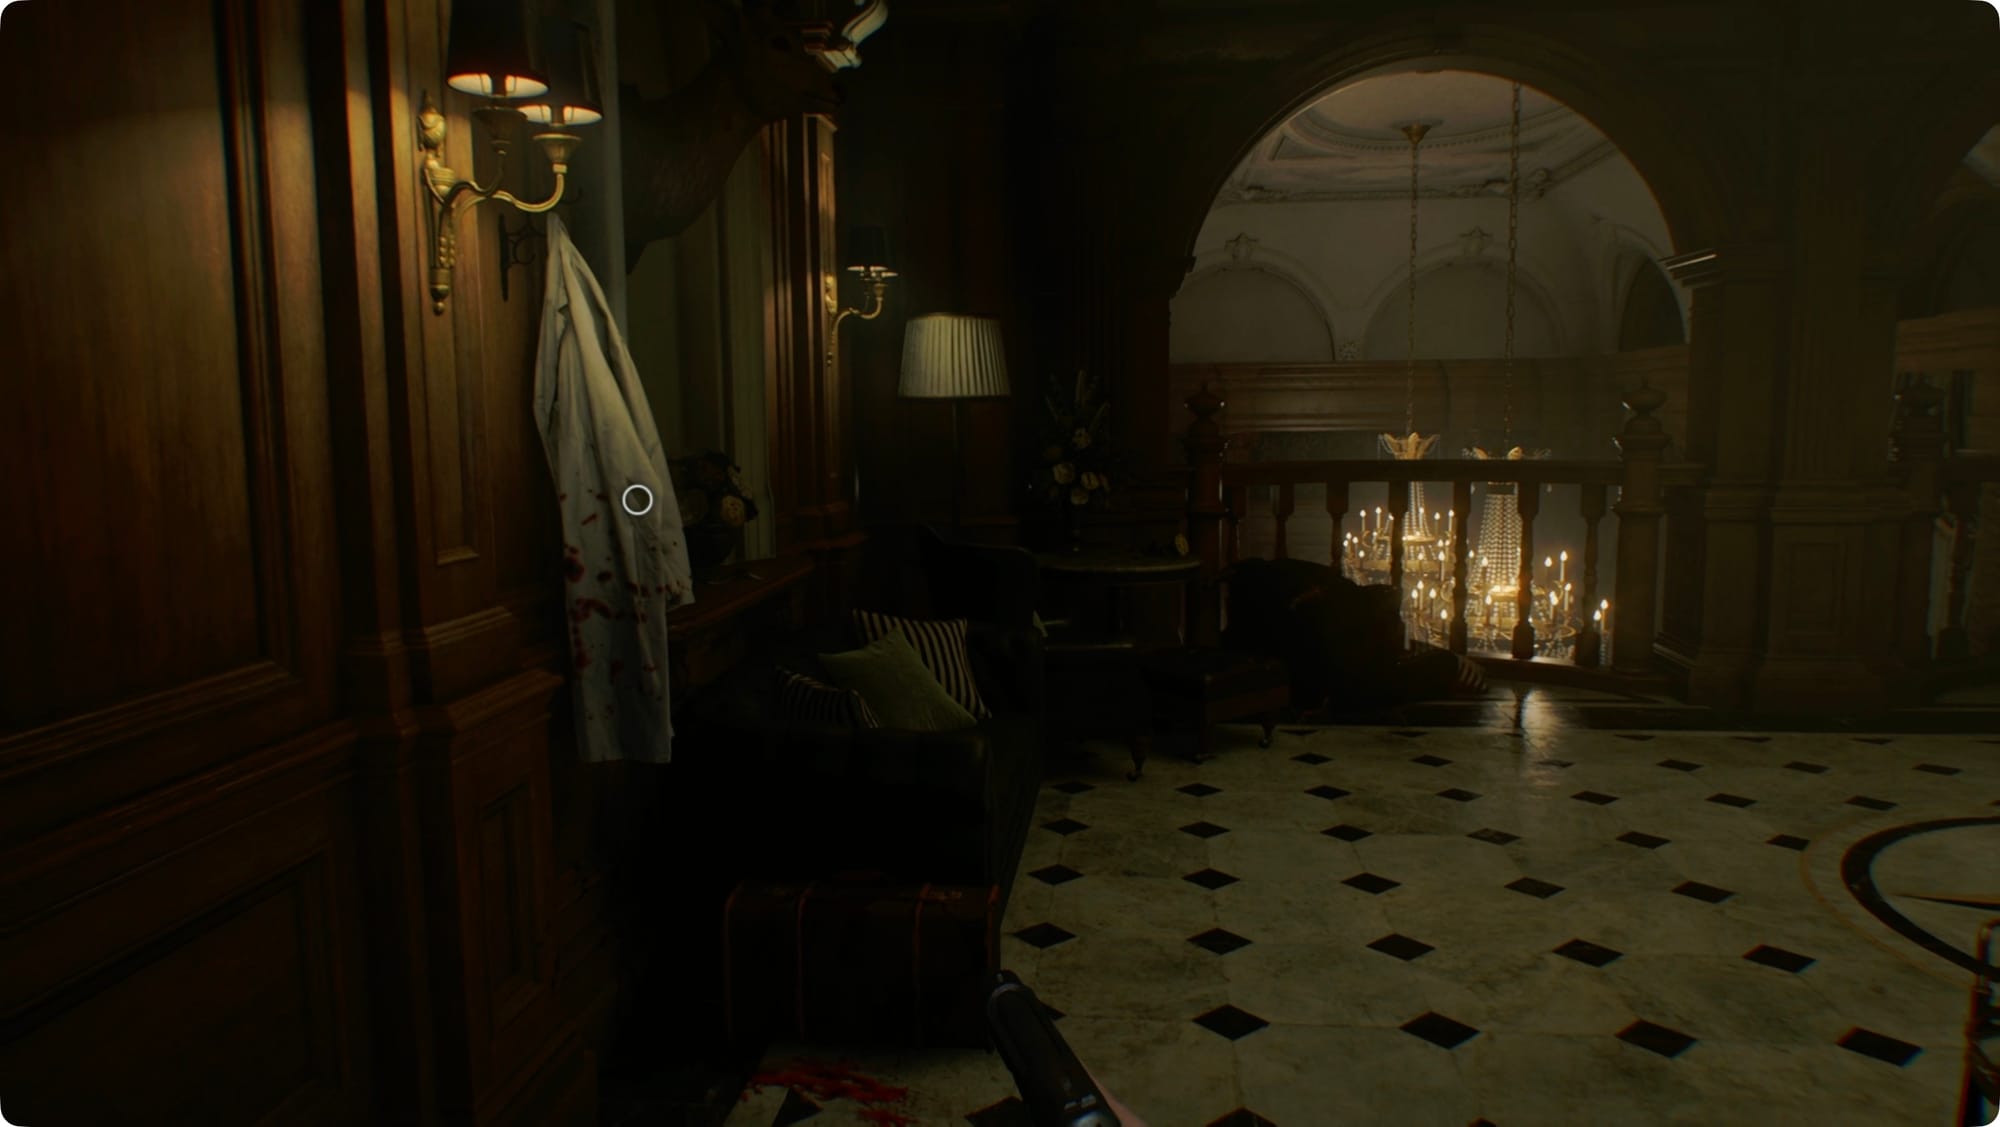
Once you hit 2F, grab the West Wing Map from the wall. Take a left. The door to the Offices on your right is warped shut, so keep going straight toward the Lounge.
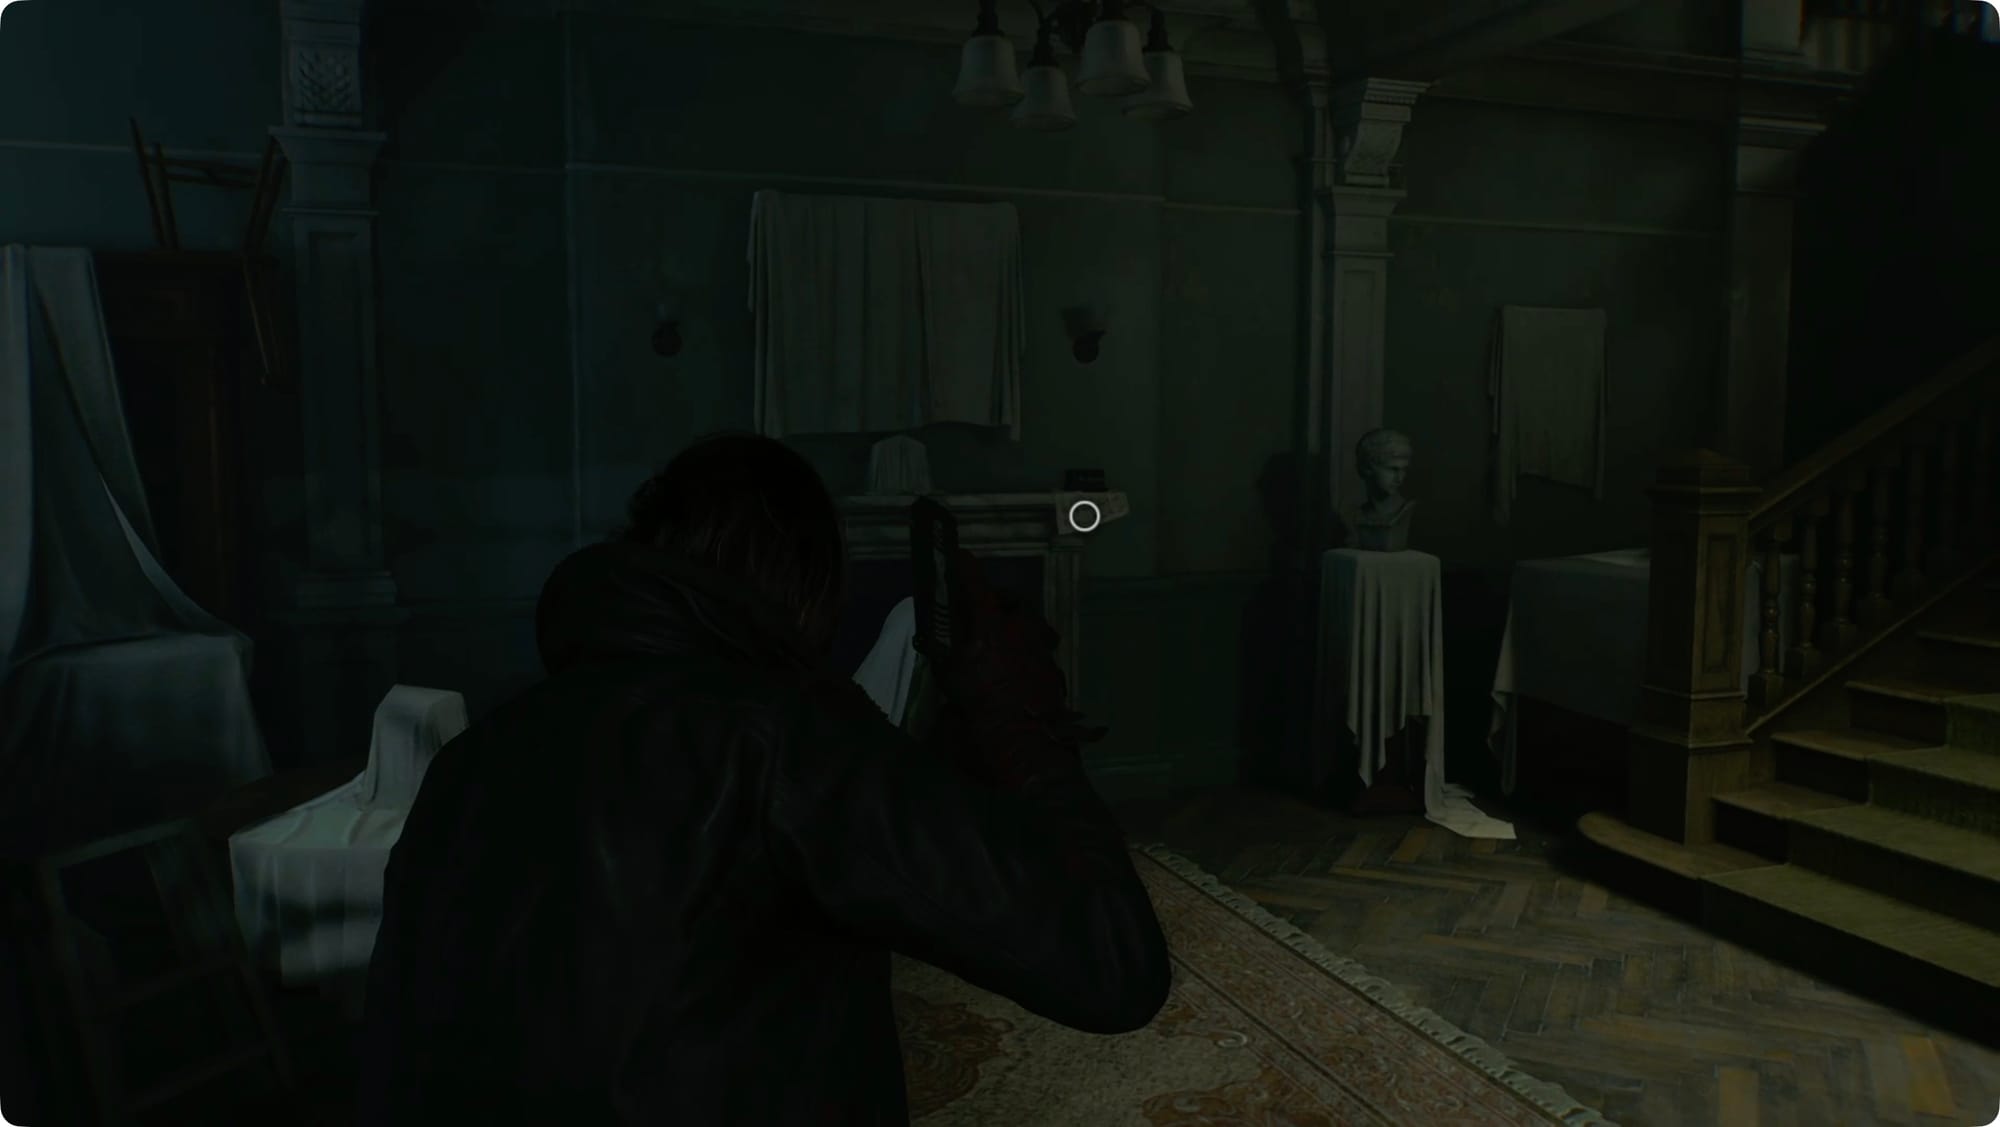
It’s full of zombie patrons, so stay crouched. Wait in the doorway for the zombie singer to come to the middle of the room, and then head off to the left. Head forward, grab the Antique Coin from the piano, and cut to the right to find a set of doors.
The wardrobe on the right is warped shut (I see a crowbar in our future). Take the left. There’s a locked drawer on the right and a scale model of the care center on the left. Before we check the door, head out to the left into (onto?) the Gallery. On the left side, grab the Folded Note from the lab coat pocket (quartz, chairman’s office), and then grab the Handgun Ammo behind you and the Green Herb on the far side.
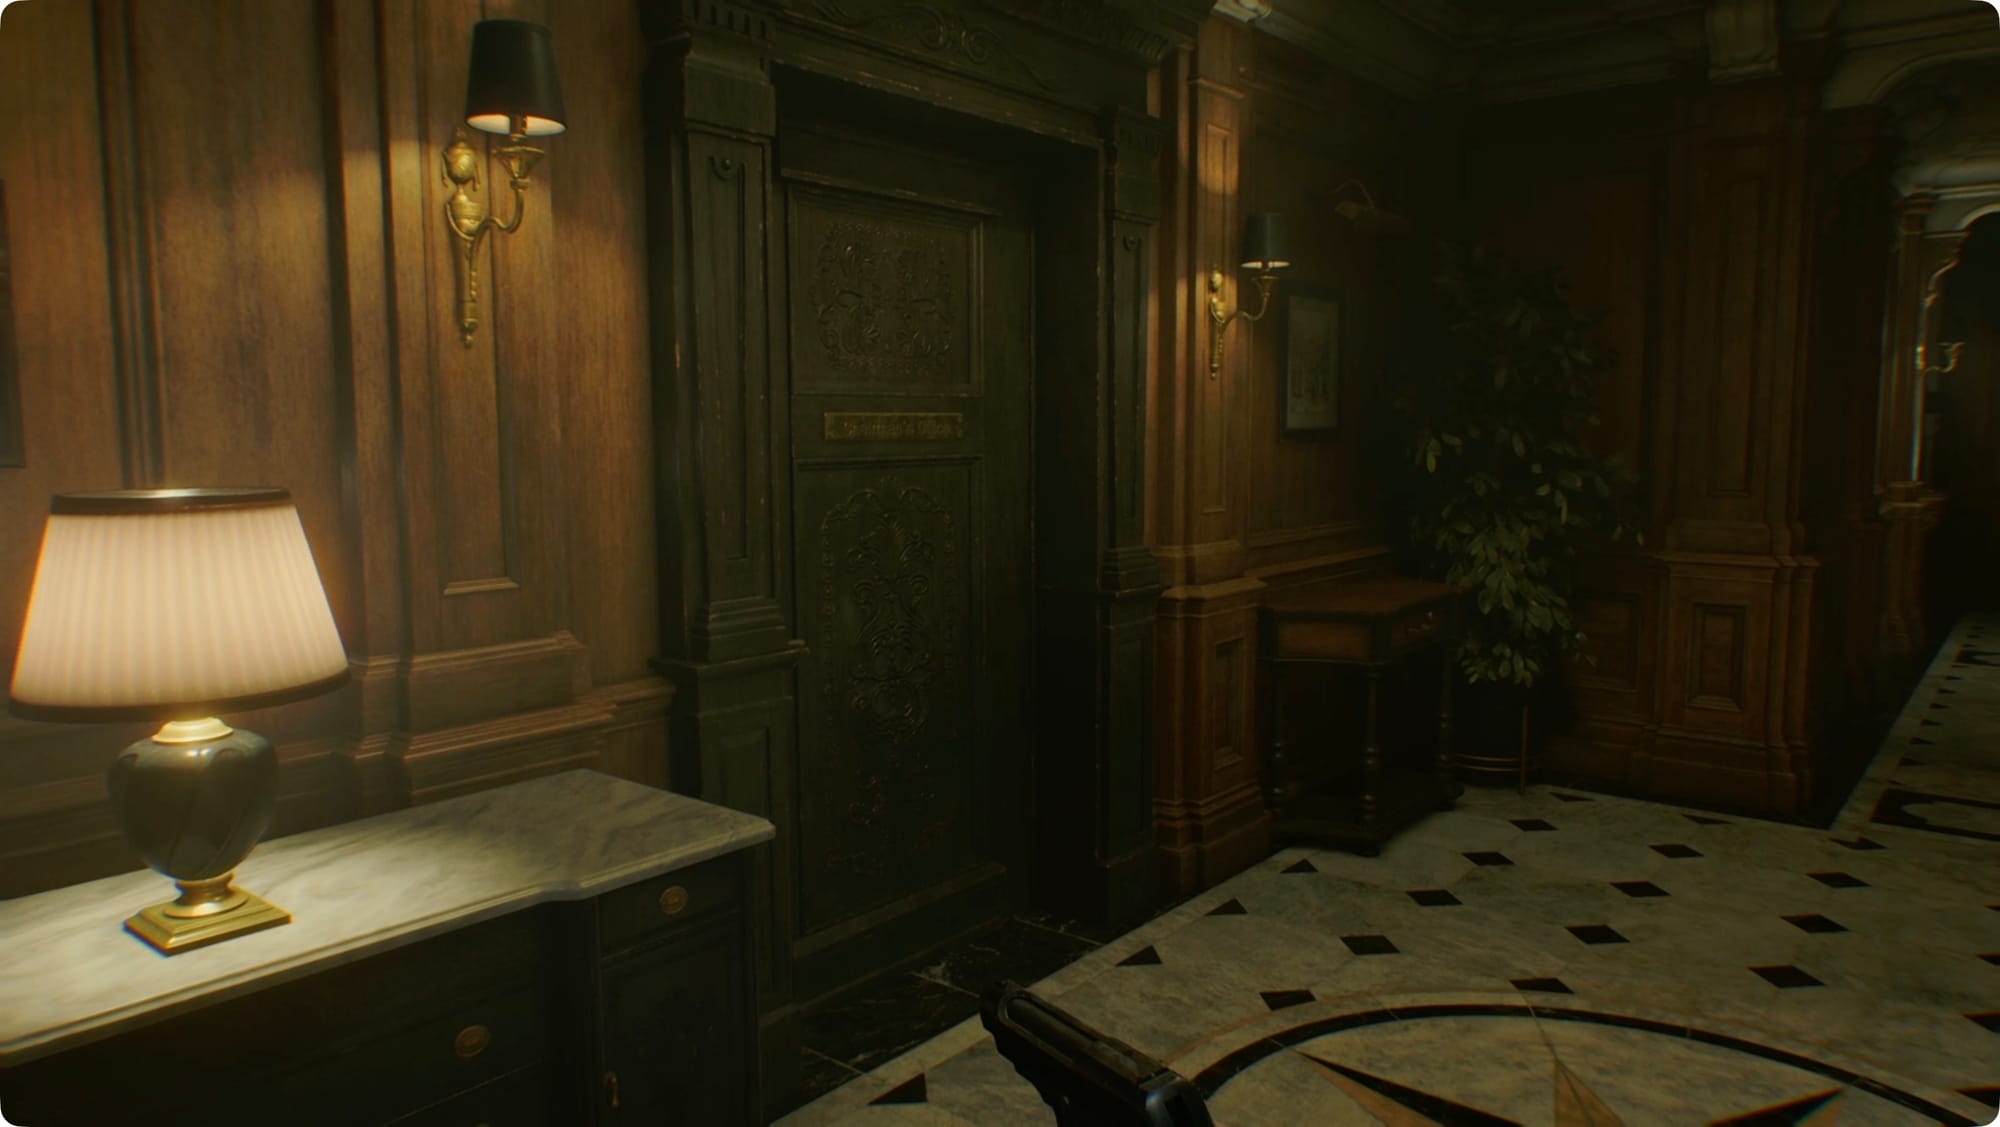
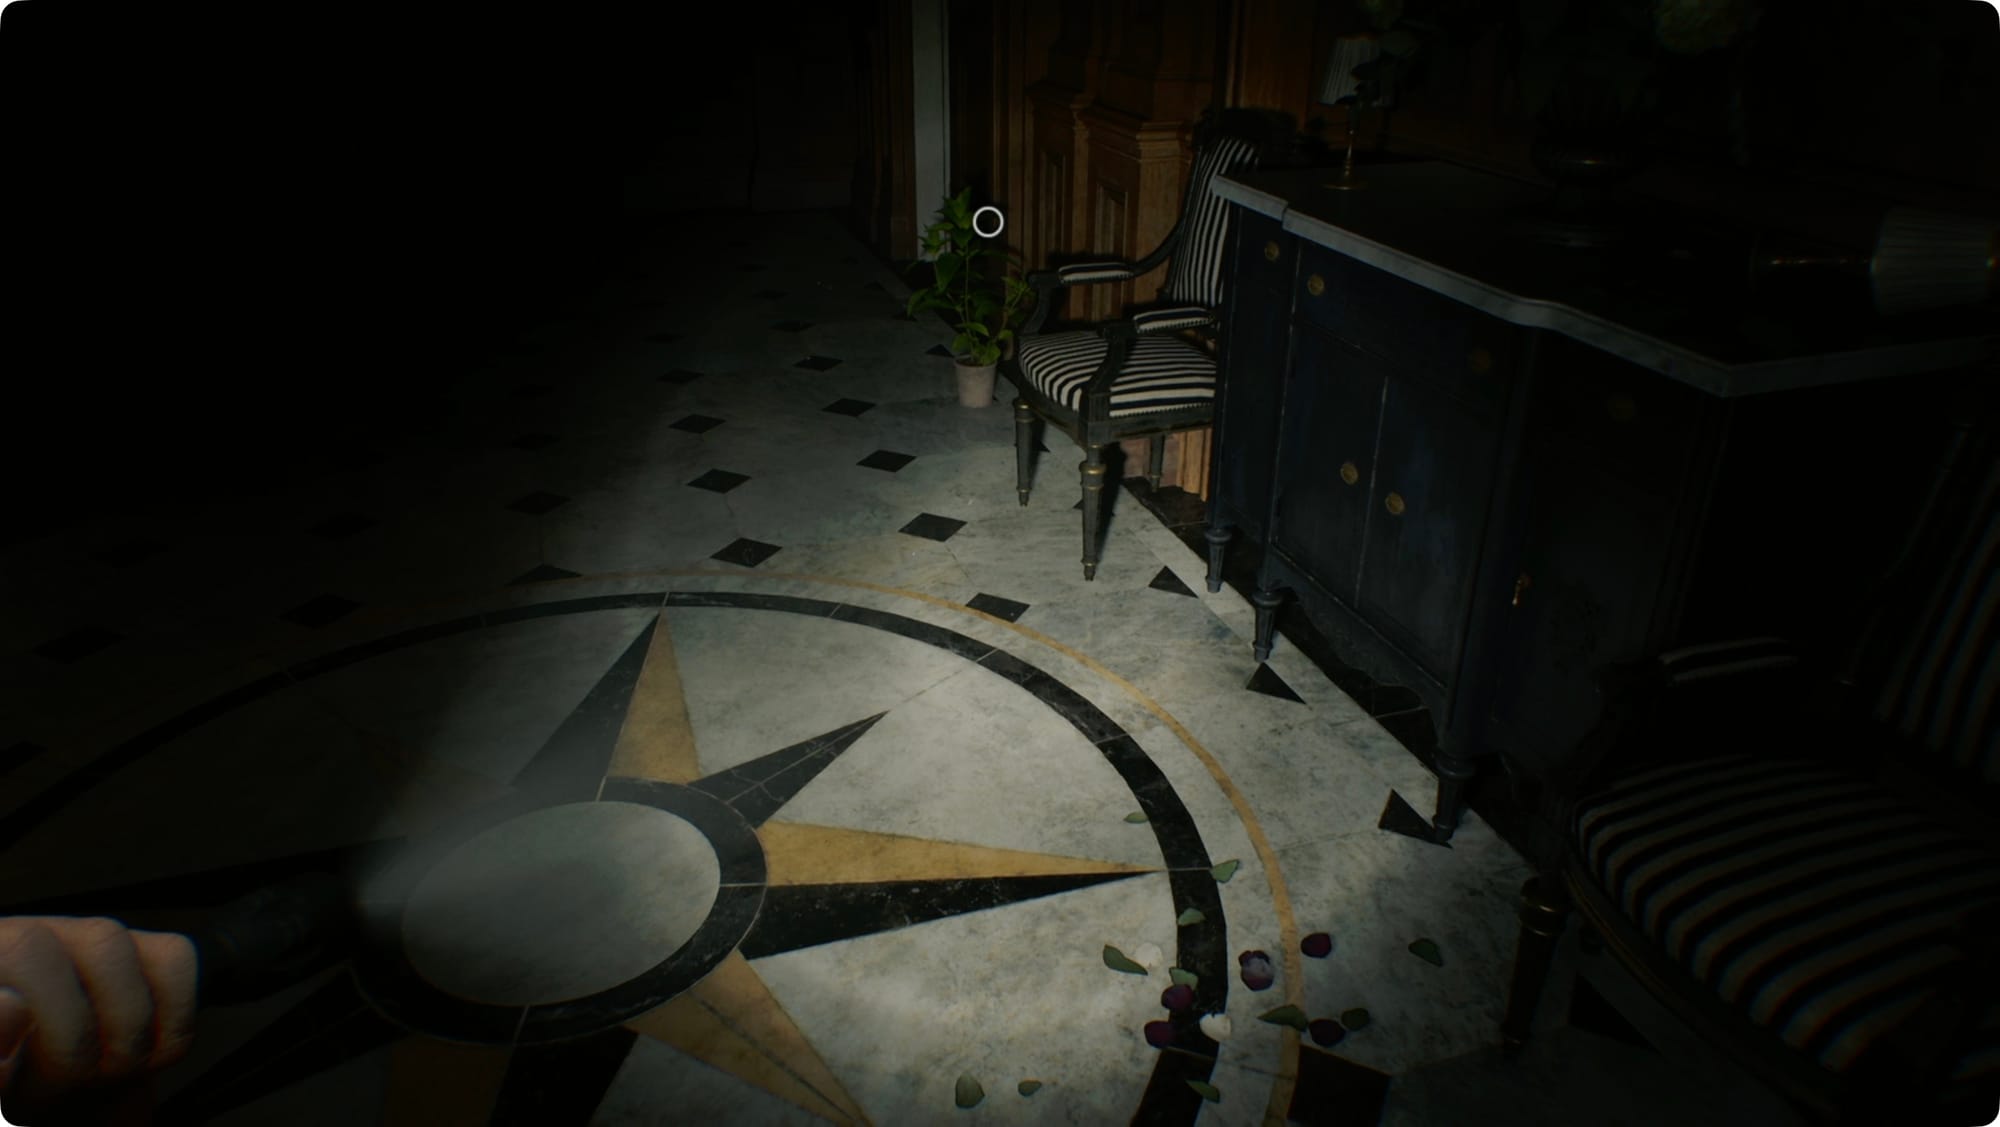
Head back to the Chairman’s Office door. Take an immediate left and turn on the lights. Grab the Unicorn Trinket Box from the table. Spin it around to find a secret button and then collect the Red Jewel.
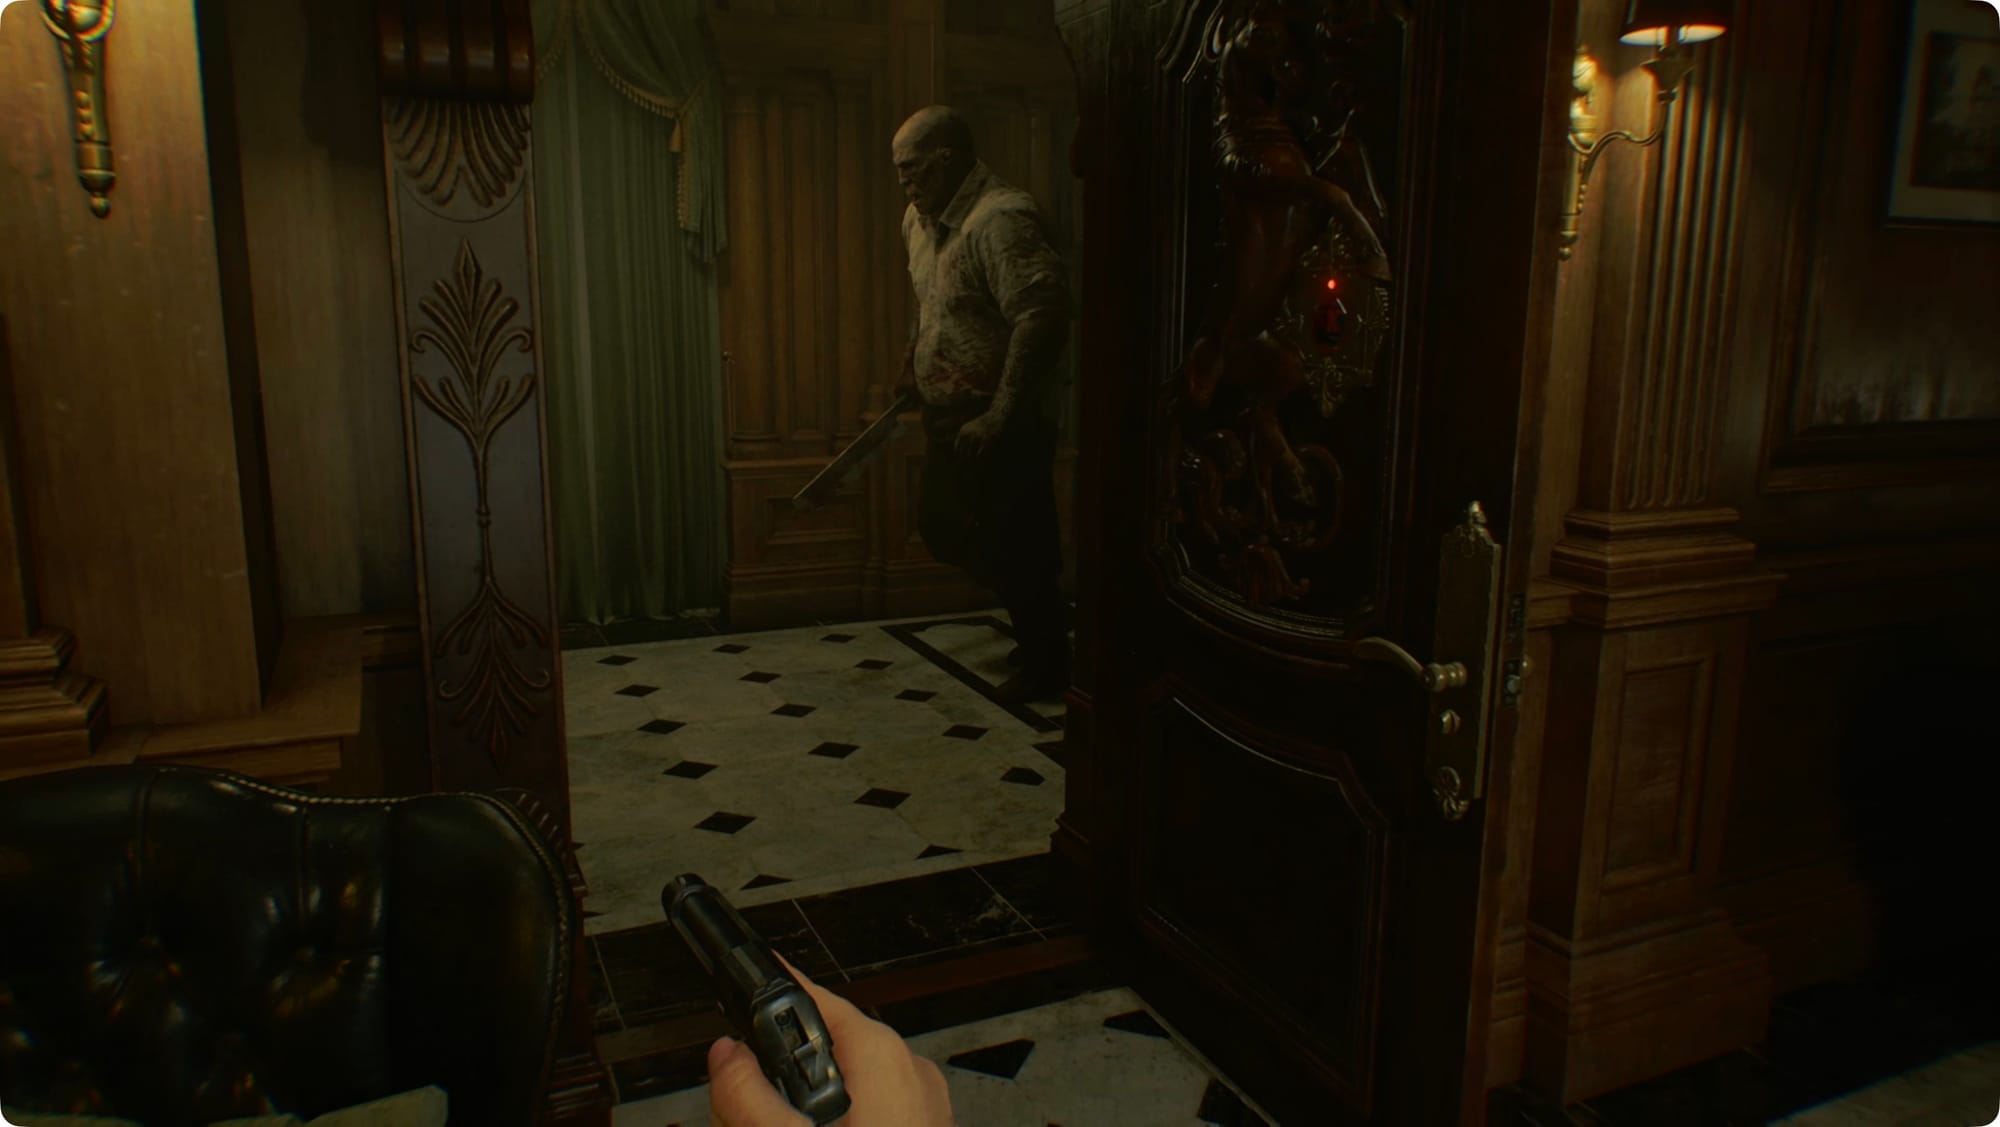
Continue around clockwise. Ignore the doorway and the zombie inside for now. Grab the Copy of an Email to a Manager. There’s a puzzle to the right we can’t solve yet, so it’s time to go deal with the zombie.

He’ll notice you as soon as you cross the threshold, so just use whatever ammo you have left and something pointy to kill him. Grab the Pencil from the desk, check the left desk drawer for some Handgun Ammo, and read the Note to the Chairman in the corner.
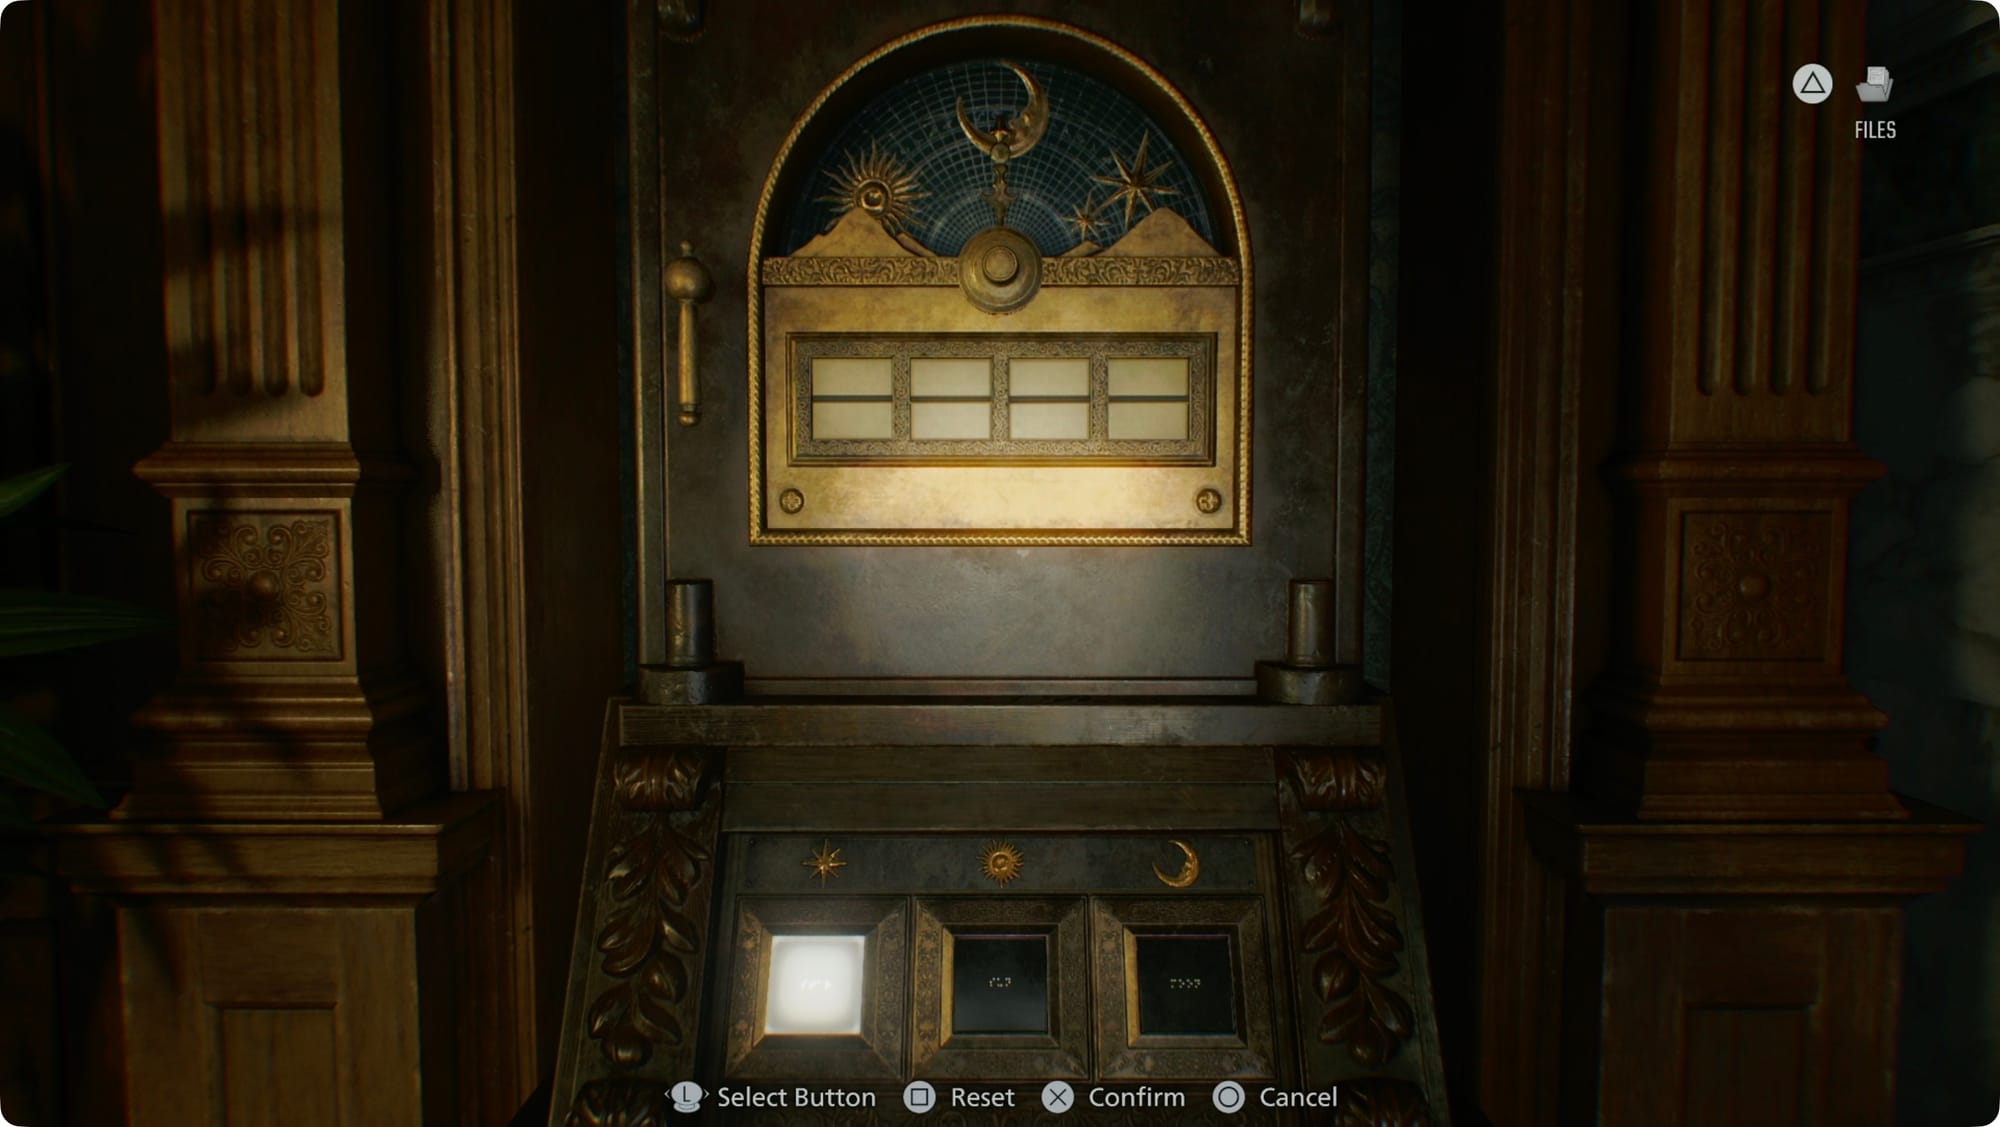
Back in the front room, use the Pencil on the Torn Journal to get the Chairman’s Note. Use it to go solve the Puzzle Box in the corner (Moon, Sun, Star, Moon) . Inside, you’ll find the Moon Quartz.
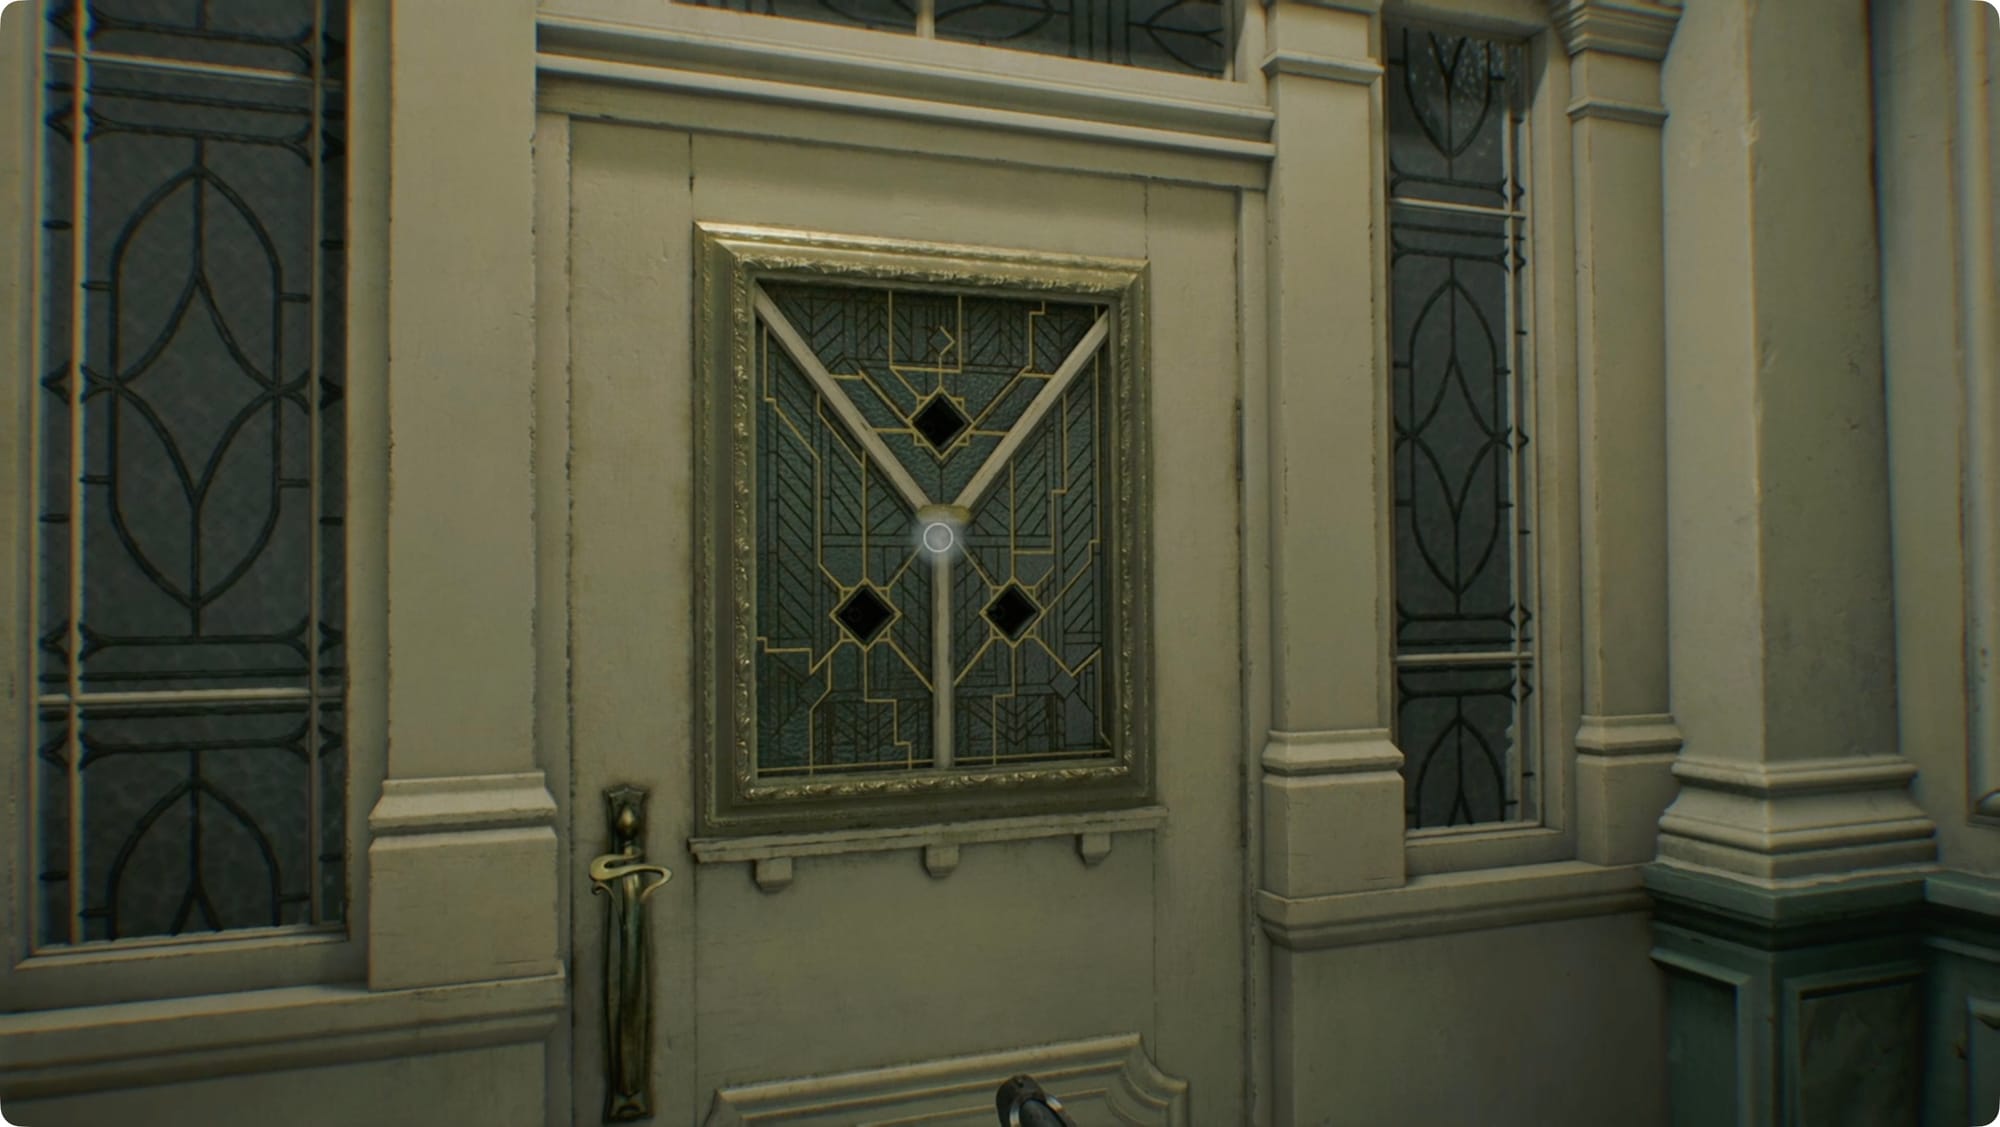
Take it down the hallway to the right (east). You’ll meet a helpful hospitality zombie on the way. Put her down, and then continue back to the Central Hall. Place the Moon Quartz in the front door.
Run back and save (why not), and then head through the West Wing door again. This time, use the Red Jewel on the Unicorn Door on your right. Duck inside quickly, though, because your friend the butcher is patrolling the hall.
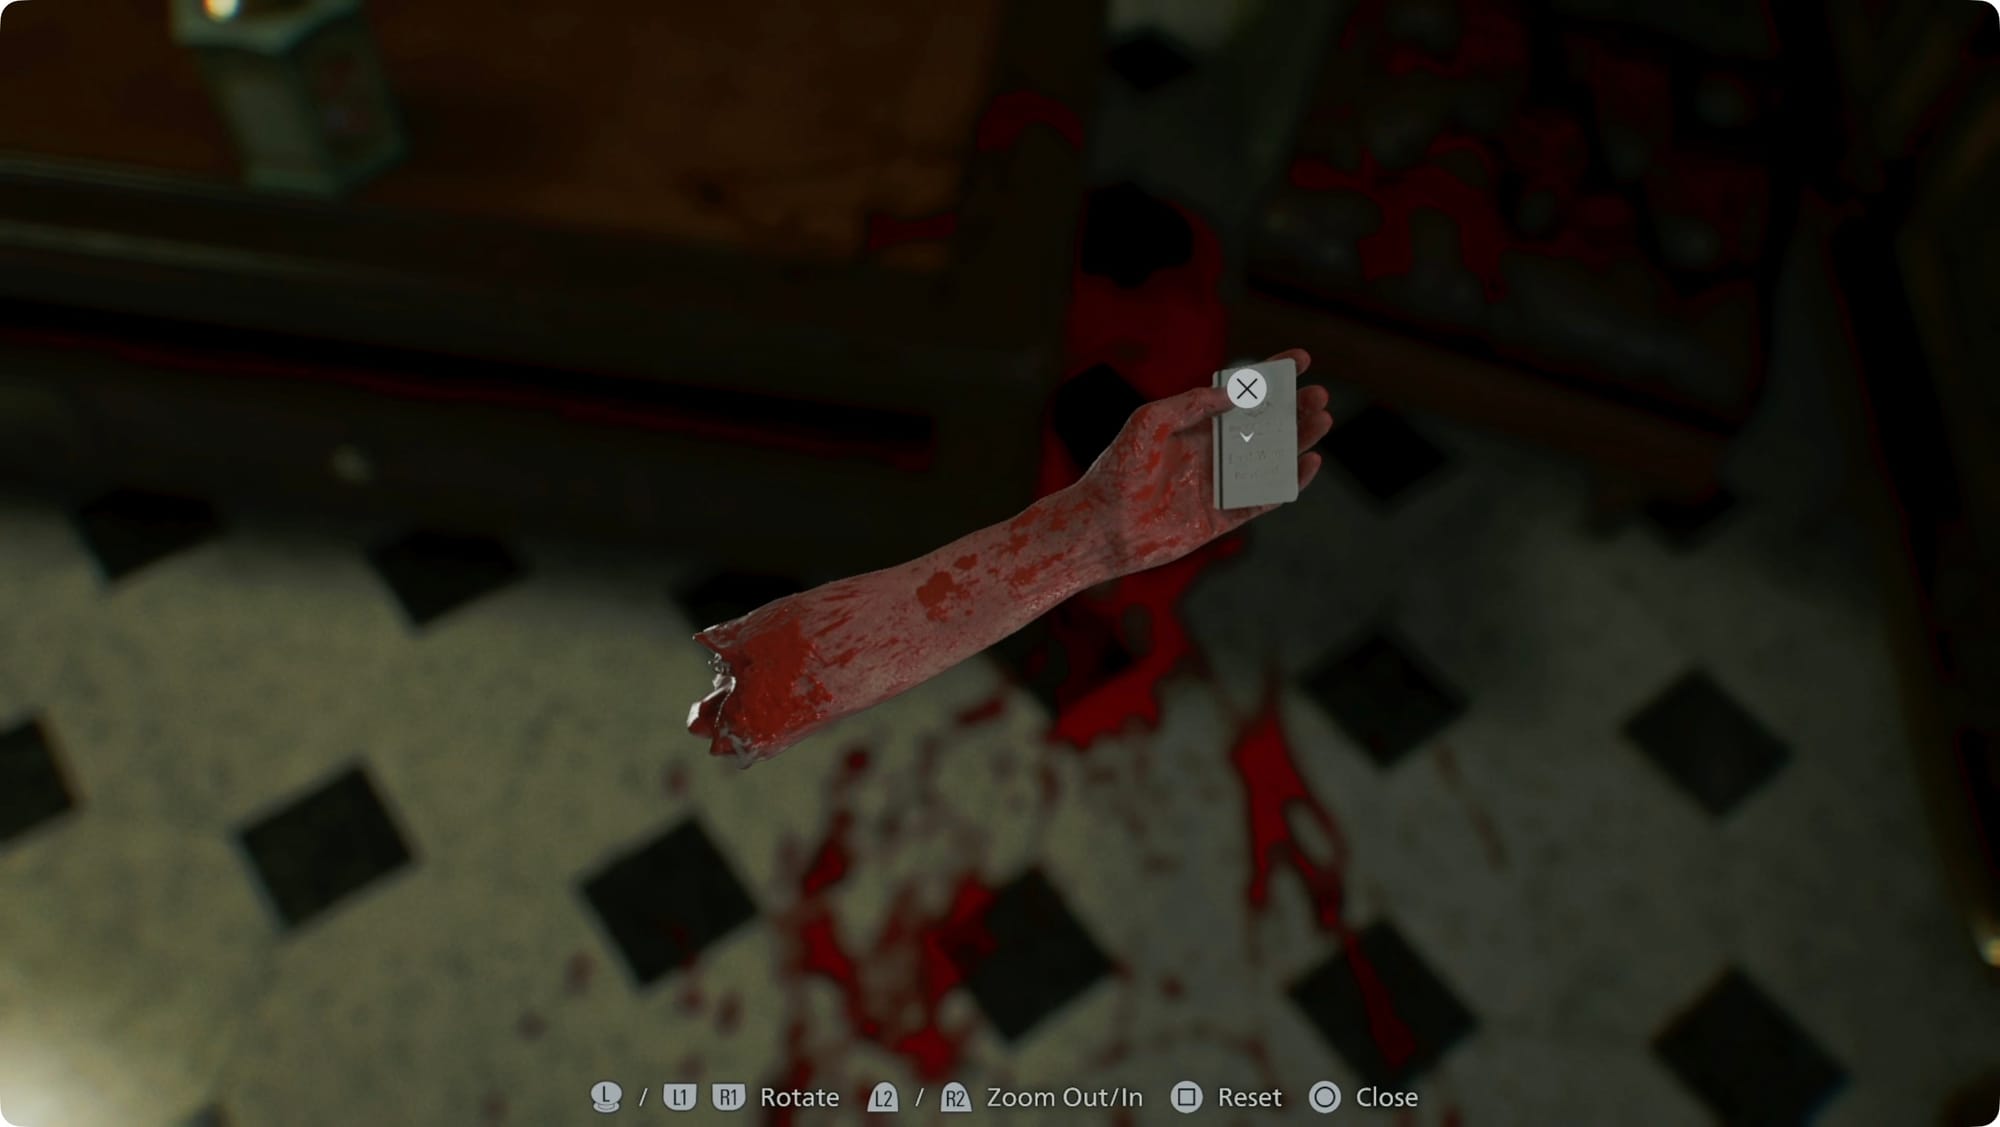
Grab the Antique Coin from the roulette table. Skip the cabinets on the left for a second and head into the alcove in the back left corner. Grab the severed arm and rotate it around to find the East Wing Keycard. Grab the Green Herb to the left and there’s another Antique Coin on the bar to the right. Loop around behind the bar to find another Antique Coin and a smashable vase with some Handgun Ammo inside.

Use the coins to buy the Hip Pouch and then go save again (remember to watch for the butcher). We’ll pick up with the East Wing in the next guide.